PCV 3 Documentation: https://jakubuhlik.com/docs/pcv/
Display, edit, filter, render, convert, generate and export colored point cloud PLY files
Available at Blender Market
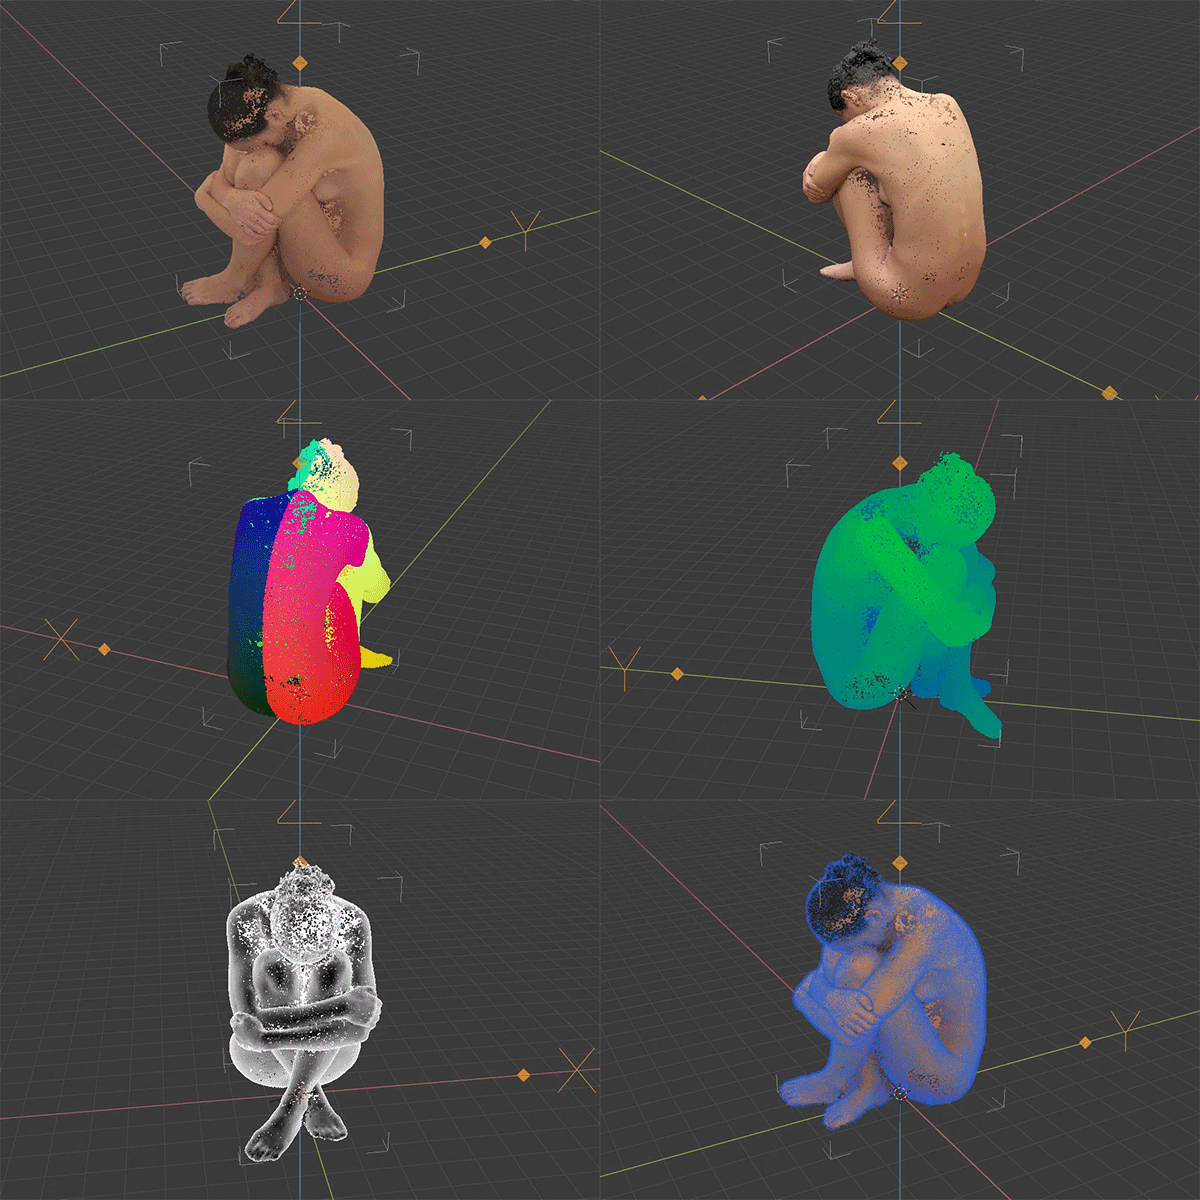
PCV 3
- Blender 3.4 and later (if
Open3Dis needed, Blender 3.6 is minimum version) - right now available as alpha release
Core
- Metal gpu backend support
- one main shader, recompiled on the fly (instead of single use shaders)
- many shading options can be mixed together (opacity, blending modes)
- several performance improvements, data batches are recreated (and uploaded to gpu) only when needed
- all custom shaders (main shaders, internal utility shaders, tools shaders, render shaders, …) has been updated to be cross compilation ready (OpenGL, Metal and upcoming Vulkan backends)
Data
- new internal data storage, preserves double precision locations, automatic shift/scale, takes less memory
- new
Datapanel with overview what has been loaded from file - filters or other operators that expect scalar field to be selected now will use
Data > Scalar Fieldslist (with exception of Edit Mode that require displayed scalar) - if linked file is not found, try to recover by loading file with same filename next to blend if exists, path will be updated if blend is saved
- shift/scale values can be customized/modified after
File I/O
- any supported format can now be selected as main file, import panel has been removed
- file loading options can be set at file select dialog
- import ascii files has been replaced with
ASCII Preset Builder - write
PTS - write
LAS/LAZ(depends onlaspy) version 1.2, point format 3 and extra dimensions - write
E57(depends onpye57) only positions, intensity (if exists) and colors - write
LAS/LAZandE57with inverse shift/scale, forPLYandPTSthis is optional - write
PLYcontrol over color format 8, 16 or 32 bit per channel - read
LAS/LAZdetection of stored normals in extra dimensions - read
E57option to create scan index scalar field while loading - read
E57option to create scan poses represented by empty objects (only in Add Helper operator: Shift+A > PCV)
Display
- better point selection shader
Packer
- formerly experimental
Packeris enabled by default - loaded point data have to marked for packing (shield icon next to file path on main panel, like with other blender datablocks), the rest is automatic, driven by blend file save and load events
Packeroperators and packed data overview is in 3d viewport popup menu
Tools
Lasso SelectandCircle Select- significantly better performance
Filter
- simple undo system, save point cloud state at any time and restore points back if filter result is not satisfactory
- filters working with meshes has been updated to not use any deprecated mesh properties
- new
Distance To Meshto scalar field - new
Reducemethod toSimplifyfilter, remove points so their count is exactly given number - new
Add Noisefilter (uses either random sampling in sphere volume to add to current positions, ormathutils.noise.turbulence_vector(quite slow), for more advanced uses, convert data to mesh > point and modify positions with geometry nodes, better performance, undo, etc.) - new
DBSCAN ClusteringandOutlier Removal(depends on Open3D) - new
Split Points By Scalar Valueto split points by integer scalar, useful for points with classification, clustering output or E57 scan index field - new filter
Clip Colors, clips color values to 0.0-1.0 - new filter
Scalar From Mesh Vertex Group, create scalar field from mesh vertex group by point proximity - new
Clone Unclipped Pointsoperator inDisplay > Clip, copy visible - unclipped points to a new PCV instance - new
Blur Scalaraverages scalar values by proximity - new
Screened Poissonsurface reconstruction, depends onPyMeshLab - new
Convert Scalarto remaping values and changing data type of scalars Remove Valuecan use integer valuesProjectfilter, addedSmooth Normalsoption to interpolate smooth normals from projected face vertex normals- removed
Discardfilters, they are substituted byDatapanel, any data except positions can be removed there
Render
- animation buffers caching to speed up rendering (depends, but by a lot in some cases), cannot be used with sequences and in some other cases, see checkbox tooltip
Convert
- complete rewrite (also because of deprecated mesh properties)
- to
Mesh- uses geometry nodes to instance mesh primitives or points, geometry nodes modifier is preserved to allow changes after conversion - to
Volume- creates vdb file that is reloaded back to blender - to
Pointcloud- pointcloud object in blender alpha builds - removed
ParticlesandInstancertypes
Generate
- complete rewrite (also because of deprecated mesh properties)
- uses Geometry Nodes as backend where applicable for much better performance
- new
Scene>Lidar Simulationgenerate type, project in spherical coords around origin, colorize with Cycles equirectangular render - new
Scene>Projectgenerate type, project from perspective viewport or camera view to scene, colorize with Cycles render using same view/camera - new
Rendergenerate type, generate from multilayer exr, camera (perspective only) and position or depth pass - active image node, material, uv etc is no longer needed, related datablocks are selected in ui by names
- removed
Particlessource
Sequence
- added support for all file types that can be exported with pcv
- new
Batch Generateuses options inGeneratepanel Batch Exportuses options inExportpanel- added more filters to
Sequence > Batch Filter
Postprocess
- output directly to image datablock for quick renders from viewport view
UI
- many areas reworked to fit new features
- presets for select panels in header
Preferences- loading defaults for main file select operatorReset PCVmoved from Load to Preferences asReset PCV On Active Object, also addedReset PCV Preferencesbutton
Known Issues
- Windows: if operation depending on any of
pye57,lasziporPyMeshLabis used, and then anyOpen3Dfunction is used, blender would crash- for example, load points from E57 file using
pye57, then runEstimate Normalsthat depends onOpen3Dwill result in crash. workaround is to load points, export as PLY (or usePackerand save BLEND), quit Blender, start Blender, load PLY (or packed BLEND) and continue
- for example, load points from E57 file using
- if
pcv > preferences > Optional Libraries > Prevent Library Conflictsis enabled (it is by default), pcv will try to prevent crashes by monitoring which library has been used in current session and not allowing conflicting operations to run and will inform you with a message popup when this happens
Other Notes
- regarding Metal support, since my mac is kinda old, it only supports Metal version older then Blender requires, so i cannot personally test Metal at all (if OpenGL works, there is chance Metal will work as well, but it is not 100%), any bug report will be appreciated. problem with Metal shader will appear as nothing is drawn on screen, no error popup is displayed. in such case, please start blender from command line and try again to set the same display options so it happens again and include all messages from terminal with report
- any suggestions and bug reports are welcome at Blender Market (Ask a Question button) or blenderartists.org
- and lastly, as per usual, it will be free upgrade
Documentation for latest PCV version 2.2.0
Contents
- Requirements
- Installation
- Update
- Optional Libraries
- General Concepts
- Main Panel
- Display
- Load
- Import
- Edit
- Tools
- Filter
- Simplify
- Project
- Transfer Colors
- Crop
- Boolean
- Color Adjustment
- Remove Color
- Remove Value
- Colorize
- Add Scalar
- Add Normals
- Add Colors
- Split
- Join
- Merge
- Discard
- Poisson Disk Elimination
- Remove Duplicates
- Voxel Downsample
- Estimate Normals
- Point Set Registration
- Surface Reconstruction
- Hidden Point Removal
- Curvature
- Render
- Convert
- Generate
- Export
- Sequence
- 3D Viewport Panel
- Preferences
- Experimental Features
- Add Menu
- API & Debug Mode
- Troubleshooting
- Bugs? Suggestions?
Requirements ^^
- Windows, Linux or macOS
- Blender 3.0 or later is required, Blender 3.3 LTS or Blender 3.4 is recommended.
- If using Blender 3.5 on macOS, switch
GPU BackendinBlender Preferences > SystemtoOpenGL, Metal backend is not yet supported, but will be as soon as possible.
Installation ^^
- download latest version
point_cloud_visualizer-###.zip - install as regular Blender addon: docs.blender.org
Update ^^
- download latest version
point_cloud_visualizer-###.zip - start Blender, go to Preferences > Add-ons and find PCV in list
- expand by clicking left corner triangle
- disable PCV unchecking checkbox next to addon name
- click
Removebutton - click
Save Preferencesbutton at bottom (skip if you haveAuto-Save Preferencesenabled) - quit Blender
- start Blender
- install new PCV version and enable
Optional Libraries ^^
- NONE of them is required for regular use, majority of PCV functionality has no dependencies
- functionality that depends on any library is marked in PCV panel with plugin icon
- all of them are installed from The Python Package Index (PyPI) using
pipcommand - they are installed to user
site-packagesdirectory as defined insite.getusersitepackages(), exact location differs for each platform, if you clickRead Me Firstbutton in PCV preferences, it will print out path to user site-packages directory
Supported libraries and their functionality in PCV
Open3D: filtersVoxel Downsample,Estimate Normals,Point Set RegistrationandSurface Reconstructionlaspy: import LAS fileslaszip: import LAZ files (together withlaspy)pye57: import E57 filesPyMeshLab: import E57 files and filterCurvatureSciPy: filtersPoisson Disk Elimination,Remove DuplicatesandVoxel Downsample(only ifPreserve Scalarsoption is enabled)
Compatibility ^^
Windows
- do NOT install
Open3DandPyMeshLabtogether, Blender will crash when one and the other is used (see Workarounds) - do NOT install
Open3Dandpye57together, Blender will crash when one and the other is used (see Workarounds)
- do NOT install
macOS
Open3D,PyMeshLabandlaszipare available for macOS 10.15 and laterOpen3Dmight require you to installlibomp, see documentation for details (might not be required in future if it is a bug and libomp will be included in installation files)- on Apple Silicon you need to use Blender Intel build to install and use
PyMeshLab pye57have to be built from source, see step by step guide in PCV full documentation
Linux
- no known limitations/problems
Installation ^^
Please see compatibility notes for your platform first. It is not needed to install library unless you need functionality that depends on it.
- go to Preferences > Add-ons and find PCV
- expand to see PCV preferences
- click
Install LIBRARY_NAMEbutton - wait until Blender is responsive again (if you start Blender from command line you can observe progress)
- restart Blender after each installed library
Specific version of library that is tested that is compatible is always installed. If library with different version already exists in user site-packages directory, it will be overwritten with required version. So, if new PCV version requires newer library version, to update simply run install library operator.
Workarounds ^^
Windows
- E57 files reading libraries (
pye57orPyMeshLab) andOpen3Dwill crash Blender if both are used in single Blender session. To use both, installOpen3Dandpye57(better option for E57 files reading) and use following system: start Blender, add an empty, go to PCV panel, import E57 file, export as PLY with PCV, quit Blender, start Blender, add PCV instance again and load exported PLY, use filters usingOpen3Das needed. Blender will only crash is one of libraries is used and then the other.
- E57 files reading libraries (
macOS
Open3Dmight require you to installlibomp(might not be required in future if it is a bug and libomp will be included in installation files). If afterOpen3Dinstallation an error complaining about missinglibomp.dyliboccurs, quit Blender, open/Applications/Utilities/Terminal.appand- install homebrew
- run
brew install libompand wait for installation to complete
Building ^^
⚠️ The only library that need to be built from source is pye57 for reading E57 files and only on macOS.
On other platforms it is installed from PyPI as other libraries, there is no need to build wheel manually. Guide is included only so macOS users can also benefit from better E57 reading library then PyMeshLab which sometimes does not preserve colors, uses scalar as colors even when colors are available and there is no way to prevent that. Guide is for macOS 12 and Blender 3.5.
- install homebrew
install correct python version (for Blender 3.5 it is python 3.10) with homebrew
$ brew install python@3.10install wheel and pybind11 packages into python
$ /usr/local/opt/python@3.10/bin/pip3.10 install wheel
$ /usr/local/opt/python@3.10/bin/pip3.10 install pybind11
install xerces-c library with homebrew
$ brew install xerces-ccheck xerces-c path
$ brew info xerces-cverify and note down path:
/usr/local/Cellar/xerces-c/3.2.4_1(version at the time of writing) we will use it laterclone
pye57repository$ cd ~/Desktop $ git clone --recursive https://github.com/davidcaron/pye57.git $ cd pye57/open
setup.pyin your favorite source code editor..after line
libE57_cpp = sorted(map(str, (HERE / "libE57Format" / "src").glob("*.cpp")))add following linelibE57_cpp = [os.path.relpath(p, start=HERE, ) for p in libE57_cpp]after line
package_data.append("xerces-c_3_2.dll")add following lines so it create another platform related block between windows and linux (some basic python skills are needed to understand, sorry) and use path to xerces-c we checked earlierelif platform.system() == "Darwin": libraries.append("xerces-c") library_dirs.append("/usr/local/Cellar/xerces-c/3.2.4_1/lib") include_dirs.append("/usr/local/Cellar/xerces-c/3.2.4_1/include")save and close
build wheel
$ /usr/local/opt/python@3.10/bin/python3.10 setup.py bdist_wheelif there is “error: Error: setup script specifies an absolute path”, delete
~/Desktop/pye57/src/pye57.egg-infodirectory and run again, that directory will be recreated- install wheel with Blender python
- i have many Blender versions installed in
/Applications/Blenderand each renamed to include its version number. so if (i guess) you have Blender installed on different location, change path to it in following commands. ensure pip is present Blender python (not a copy-paste command, adjust path to Blender.app)
$ /Applications/Blender/blender-3.5.0.app/Contents/Resources/3.5/python/bin/python3.10 -m ensurepipmacOS 11+ versioning is not that easy.. lets it turn off for a session, otherwise pip will fail with
ERROR: pye57-0.4.1-cp310-cp310-macosx_12_0_x86_64.whl is not a supported wheel on this platform.$ export SYSTEM_VERSION_COMPAT=0use pip from Blender python to install just built wheel into user site-packages (
~/.local/lib/python3.10/site-packages) (not a copy-paste command, adjust path to Blender.app and wheel filename)$ /Applications/Blender/blender-3.5.0.app/Contents/Resources/3.5/python/bin/python3.10 -m pip install --user ~/Desktop/pye57/dist/pye57-0.4.1-cp310-cp310-macosx_12_0_x86_64.whllibrary files will be installed to
~/.local/lib/python3.10/site-packagesnow you can delete
~/Desktop/pye57- now
pye57should be available in PCV in Blender 3.1, 3.2, 3.3, 3.4 and 3.5 (all have the same python version)
If you are using Blender 3.0, steps are almost identical, you only need to $ brew install python@3.9 and then use it to build wheel, and after building use Blender 3.0 python binary to install wheel. It will also install to a different directory (~/.local/lib/python3.9/site-packages).
General Concepts ^^
UI Locations ^^
- main PCV panel is located in 3d viewport Sidebar (N) under “Point Cloud Visualizer” tab
- one more extra pop up panel into 3D Viewport header at the right corner
- helper operator to 3D Viewport > Add menu
Integration ^^
- PCV uses any Blender object as a “point in space”, that object origin serves as zero point. Point cloud will then draw in object local space. i.e. point cloud will be transformed in the same way as container object. The best is to use “Empty” object type as containers.
- PCV does not store loaded points in blend file because there is no suitable data type available. only PCV settings and path to data file is stored. when blend file is reopened, points need to loaded or imported from linked file again by clicking
Draw(PLY files) orImport(other file types) button. - any changes to points made with PCV have to be saved using Export panel to PLY before quitting Blender or loading blend file otherwise will be lost
Large Datasets ^^
- currently, PCV needs to load all points from source file and keep them in system memory
- during loading, system memory usage will peak quite high, 4 (and more in some cases) times the runtime usage
- for display, PCV need to upload all points that are going to be displayed (you can control amount with PCV > Display > Percentage slider) to gpu memory
to determine approximate maximum number of points your gpu can display at once you can use calculator in PCV preferences (for example 8GB gpu can display ~300M points with default shader and disabled scalars), calculator formula is simple:
ram = 8192  # MB
b = (1024*1024) * ram  # bytes
# default shader uses 3x float32 for point location and 4x float32 for color (rgba)
# float32 takes 4 bytes, hence 3*4 + 4*4 bytes
n = int(b / (12 + 16))
print(n)  # 306783378
trying to display more points (i.e. uploading more data than gpu memory can contain) will result in Blender crash or freeze
- when extremely big data need to be loaded and is not required to work with exactly all points, alternative loading methods
Every NthorSlicecan be used to reduce number of points during loading
Main Panel ^^
Please see property or operator tooltip in ui for more info.
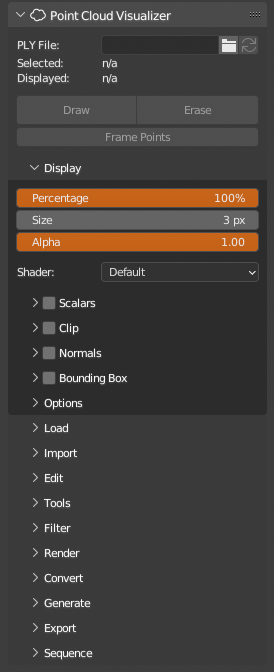
PLY File- choose PLY file to displaySelected/Loaded- file nameDisplayed- number of points on screen from this PCV instanceDraw- start drawing points in viewport. if path is set, but points are not loaded, it will load points from file firstErase- stop drawing points in viewportFrame Points- align viewport camera to fit all points, will adjust viewport clip distances if needed
Display ^^
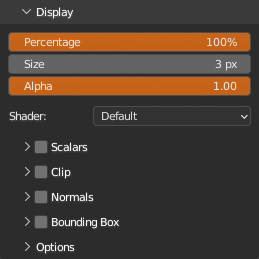
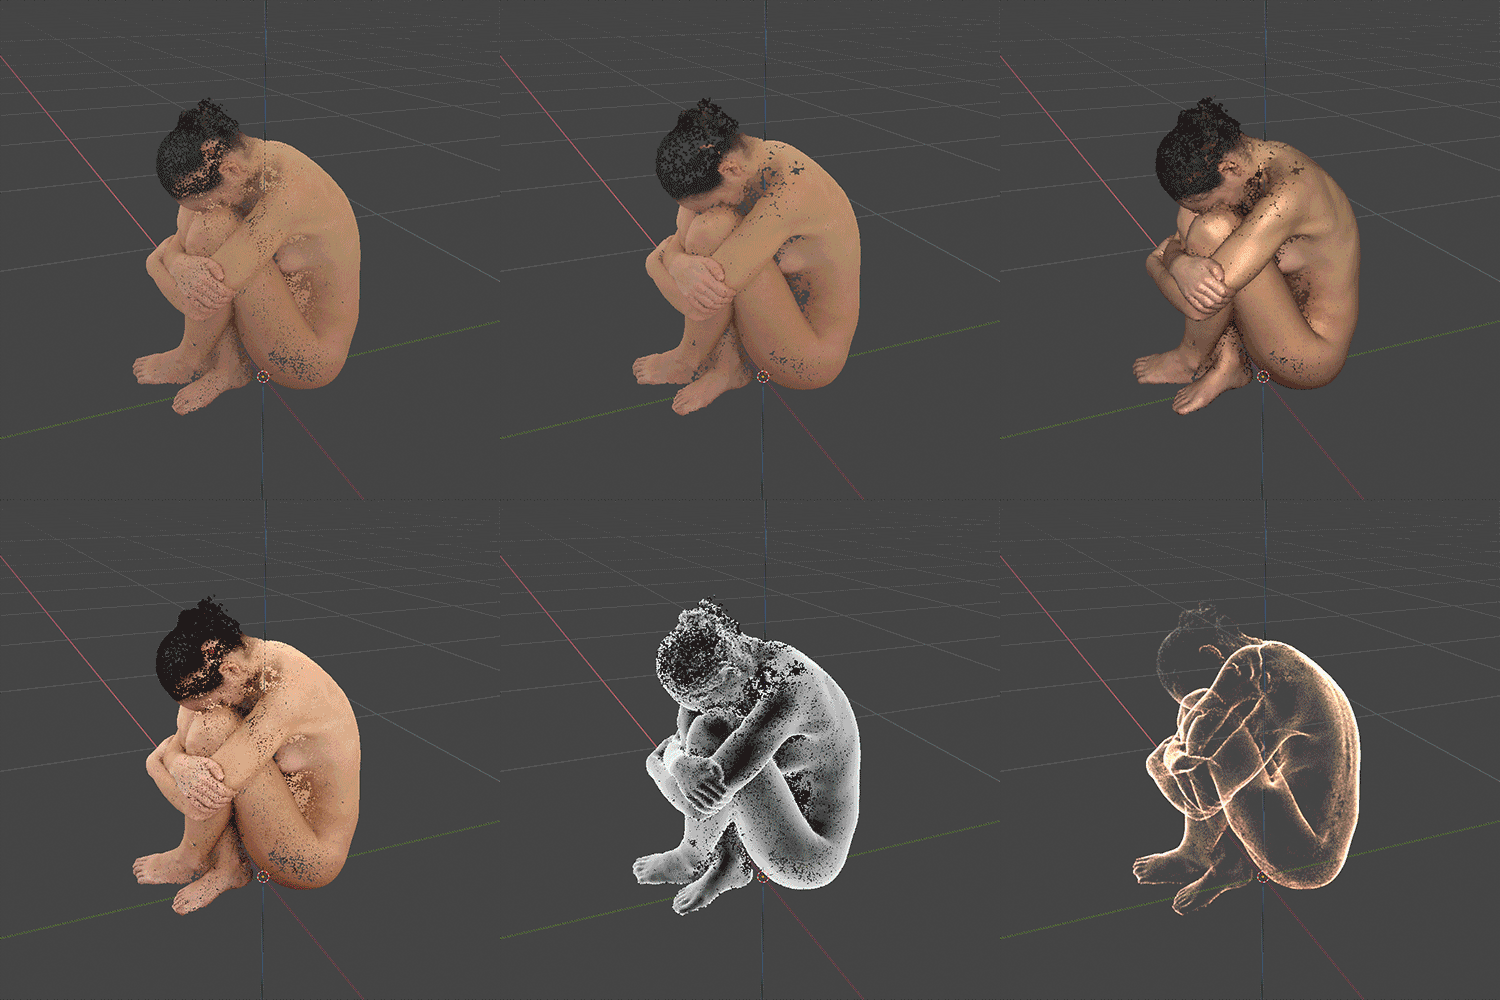
Percentage: when less that 100%, given percentage is sliced from loaded point data and used for display. May not work ifLoad > Shuffle Pointsis disabled, then it depends on how points are stored in fileSize: in pixels for pixel based shaders, in scene units for billboard shadersAlpha: global alphaShader: choose shader to draw points with. Options for selected shader are displayed bellow. Some shaders require colors and/or normals to be present. If missing, warning will be displayed bellow.Default: Default shaderCull: Omit backfacing points (requires normals)Billboard: Geometry based shaderBillboard Cull: Omit backfacing points (requires normals)Fast: Fastest shaderPhong: Phong shading, light fixed to viewPhong Billboard: Geometry based shader with Phong shading, light fixed to viewPosition Colors: Point locations to RGBHeight Colors: Point height to RGB (using global or local axes)Normal Colors: Point normals to RGBColor Adjustment: Shader for quick color adjustment previewAlpha: Default shader with alpha per pointIllumination: Default shader with artificial light and shadowDepth: Default shader colorized by distance from view cameraDepth Effects: Default shader colorized by various distancesFresnel: Fresnel shaderMatCap: Use MatCap imageMatCap Billboard: Use MatCap imageX-Ray: X-Ray
Scalars ^^
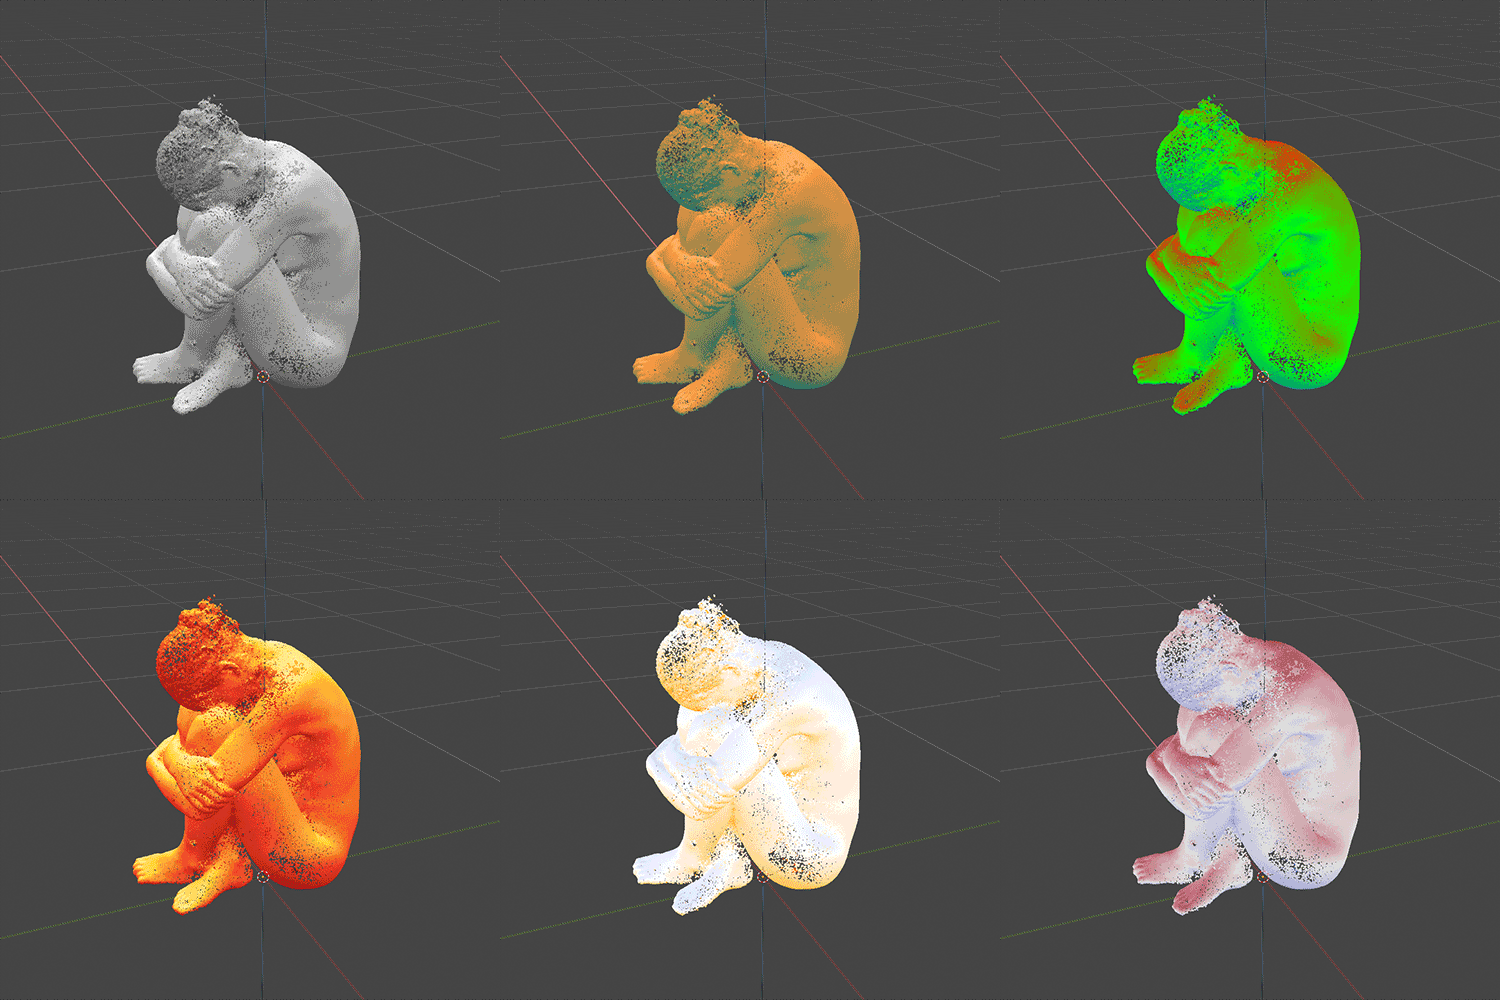
Colorize points by scalar value. Choose scalar name from list. By default scalar value are scaled to fit in range 0-1 from lowest to highest value found. This behavior can be turned off or run at any time with buttons next to Range values. You can also choose to display in color Scheme instead of grayscale or lower Alpha of scalar over original colors or choose blending Mode with original colors.
Clip ^^
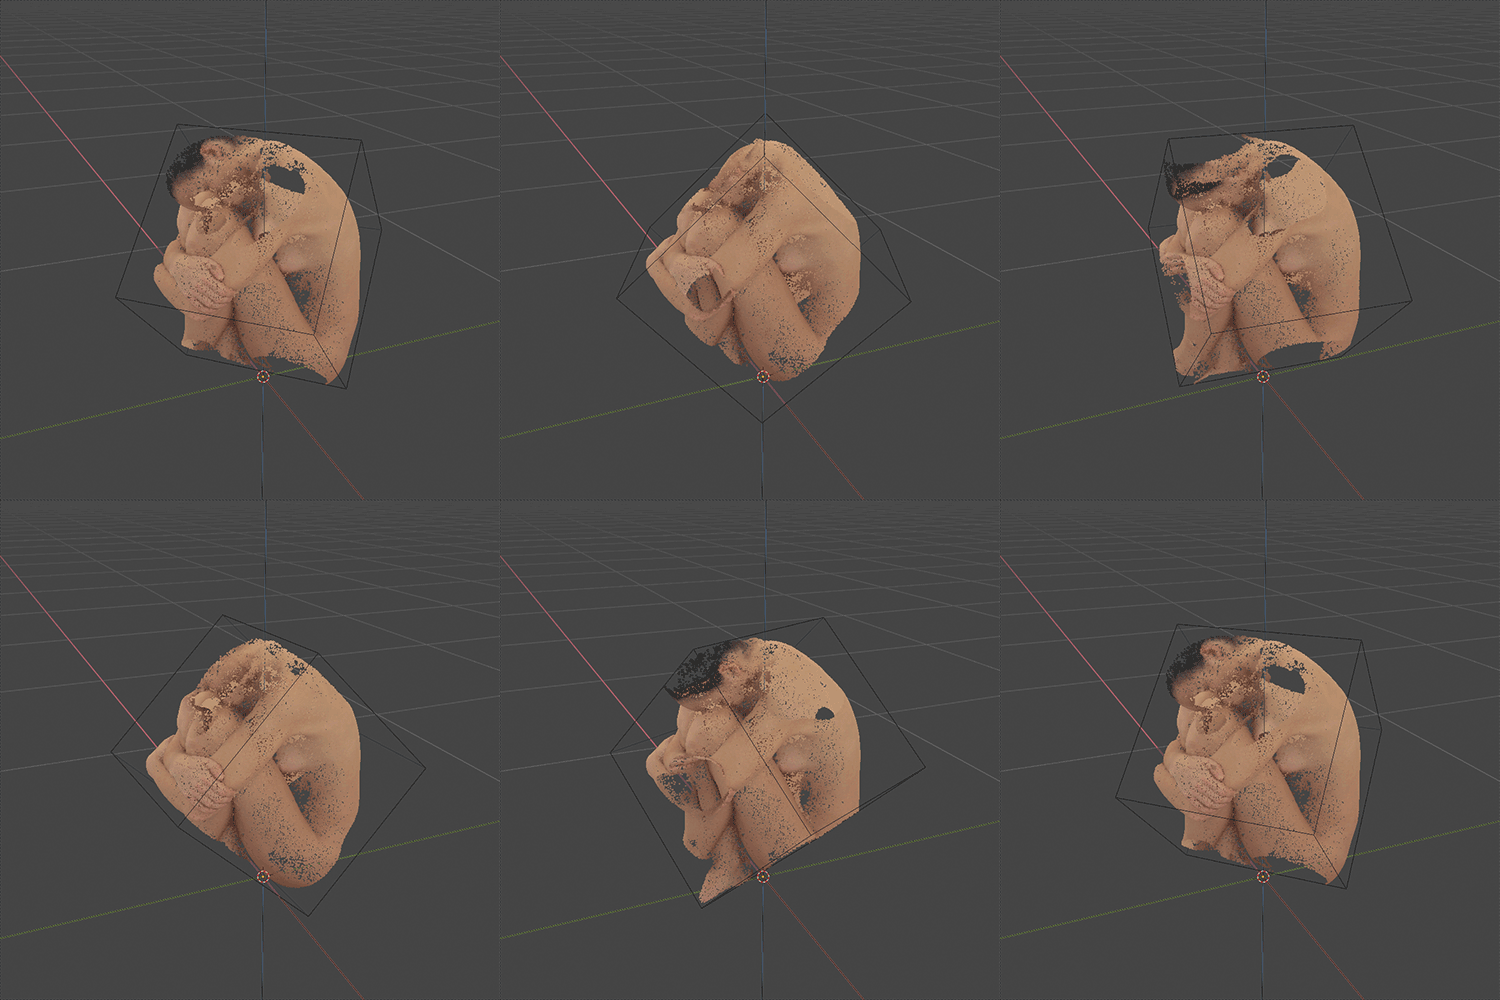
Clip displayed points by 6 planes. You can set plane values directly (first three values are plane normal, last value is distance from origin) or use any Blender Object bounding box to set planes from it. If Clip Planes Live Update is enabled, bounding box source object can be animated and clip planes will be updated on each redraw.
Normals ^^
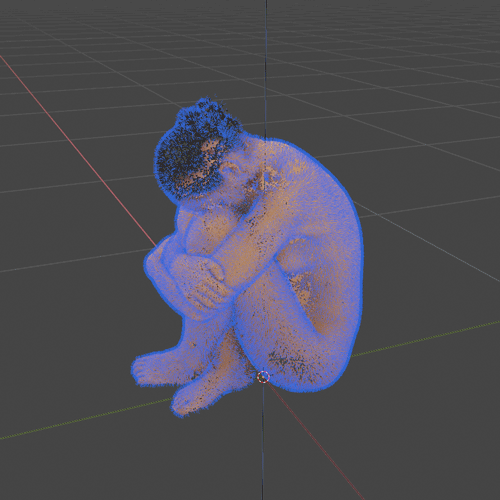
Display point normals as lines in viewport. Control their Length, Alpha and Color. If loaded points has no normals, default normal (0,0,1) will be displayed.
Bounding Box ^^
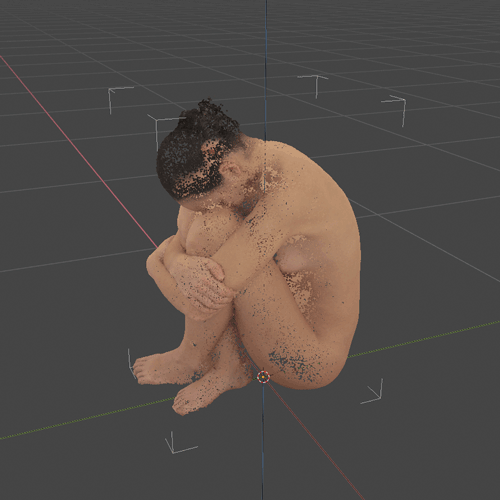
Display points bounding box.
Options ^^
Namedraw PLY file name at container object originIn Frontdraw points in front of everything else in the viewport
Load ^^
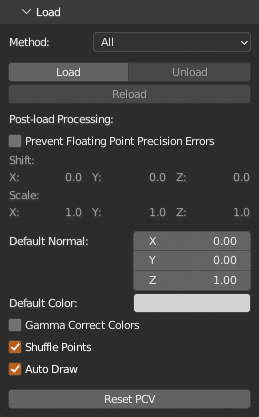
Loading options mainly for PLY loading. Other file formats importing (from external libraries) does not follow chosen Method (except ASCII import). Load and Reload operators are for PLY files only only, they use path to PLY set in main panel on top.
You can load less points from a big PLY files to save gpu memory using Every Nth or Slice methods. Method Every Nth does exactly what is says: 1 = all points, 2 = every second, 3 = every third. Slice method loads continuous part of file between From and To markers. Value of 0.0 = file start, 0.25 = first quarter of file, 0.5 = middle of file, etc.., if Slice From > Slice To, values are swapped.
Post-load Processing section applies on all file formats.
- when
Prevent Floating Point Precision Errorsis enabled, PCV will attempt to prevent floating point precision errors by scaling and moving points to fit <1.0e6 diagonal and <1.0e4 center coordinate. Original scale and location could be optionally restored when points are exported back to PLY. - if normals are missing in loaded data, they are added as default value. The same applies on colors.
Gamma Correct Colorswill fix colors if you are for example working with linear images and photogrammetryShuffle Pointsafter loading shuffles all points soDisplay > Percentageworks better, if you are loading large datasets and you don’t needPercentageto work correctly, you can speed up loading process by disabling points shufflingAuto Drawoption will draw point to viewport after loading/importing without clickingDrawbutton on main panel
Reset PCV button resets everything in current PCV instance to default values.
Import ^^
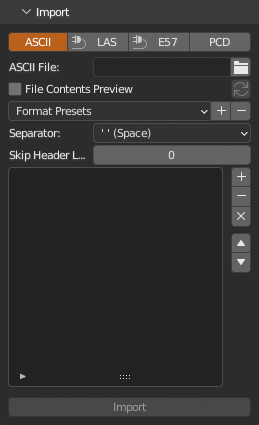
LAS requires laspy, LAZ laspy with laszip and E57 either pye57 or PyMeshLab installed from PCV preferences.
ASCII: import any structured text file format- choose file
- if
File Contents Previewis enabled, first 10 lines from file are displayed - choose correct separator and how many lines to skip from top if any header is present
- then use list bellow to assign data types to columns. click
+to add line as “column”, choose data name (location, normal, scalar, etc.) and data type (float, int, etc.) - click
Importto load points - if all went well, you can save all setting to a preset to fill all properties next time with choosing preset from menu
LAS/LAZ: import LAS or LAZ usinglaspy(LAZ files needlaszipinstalled as well), choose file, clickImportE57: import E57 usingpye57orPyMeshLab, choose file, clickImportPCD: choose file, clickImport, experimental feature, only version 0.7 is supported
Edit ^^

Center Origin: moves points so center of points is at container originApply Transformation: applies container transformation on points and resets container transformation
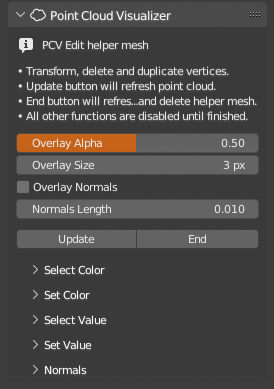
Enable Edit Mode: edit points using Blender Edit Mode- when enabled, points are converted to mesh vertices and PCV draws original points over vertices
- you can use edit vertices with Blender tools
- to update edits in points, click
Update - to finish click
End - edit mode includes subset of display options, selection operators that select mesh vertices based on points color or scalar value, operators that set color or value and operator to flip point normal (not mesh vertex normal, those are ignored)
- while you can create new mesh vertices and they will be added to points, it is better to duplicate and move existing so all colors/normals/scalars are already set
Tools ^^
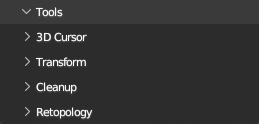
Collection of modal operators for direct editing of points, points container object or mesh. If operator is running all panels but Tools are disabled. To switch tool, click its button on panel.
All Retopology and Transform tools and Place 3D Cursor (GPU) are GPU accelerated. They utilize GPU for point selection. Points are selected in Detection Radius around mouse pointer, point closest to screen space center is selected. Point selection works best if points are that dense so they cover points behind them. If your points are too sparse, there are several options how to prevent selection of points behind those on “surface”. Increase point pixel size for pixel based shaders, or switch to any Billboard type shader and adjust point size so they cover space between them, or enable Use Depth (D key shortcut) at running tool panel to utilize gpu depth buffer to determine which points are closest in tool Detection Radius.
3D Cursor ^^
3D Cursor tools operate only on 3d Cursor.
Place 3D Cursor
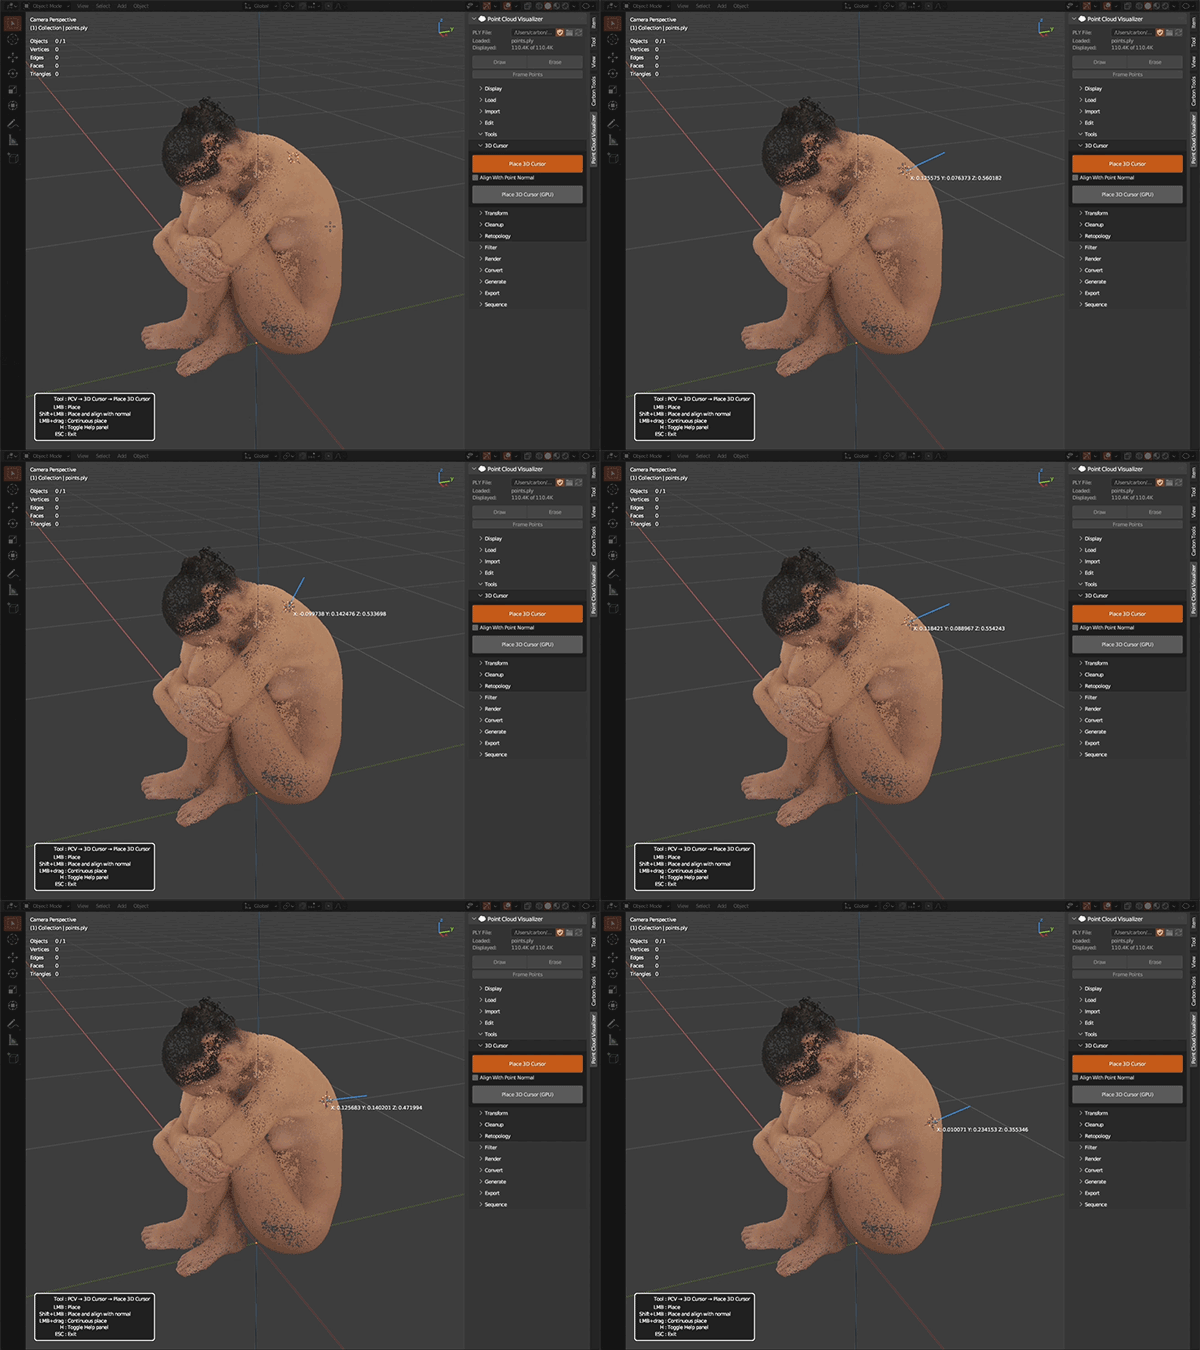
Place 3D Cursor on closest point in cloud under mouse cursor. CPU variant, faster on smaller datasets.
LMB: PlaceShift+LMB: Place and align with normalLMB+drag: Continuous placeH: Toggle Help panelESC: Exit
Place 3D Cursor (GPU)
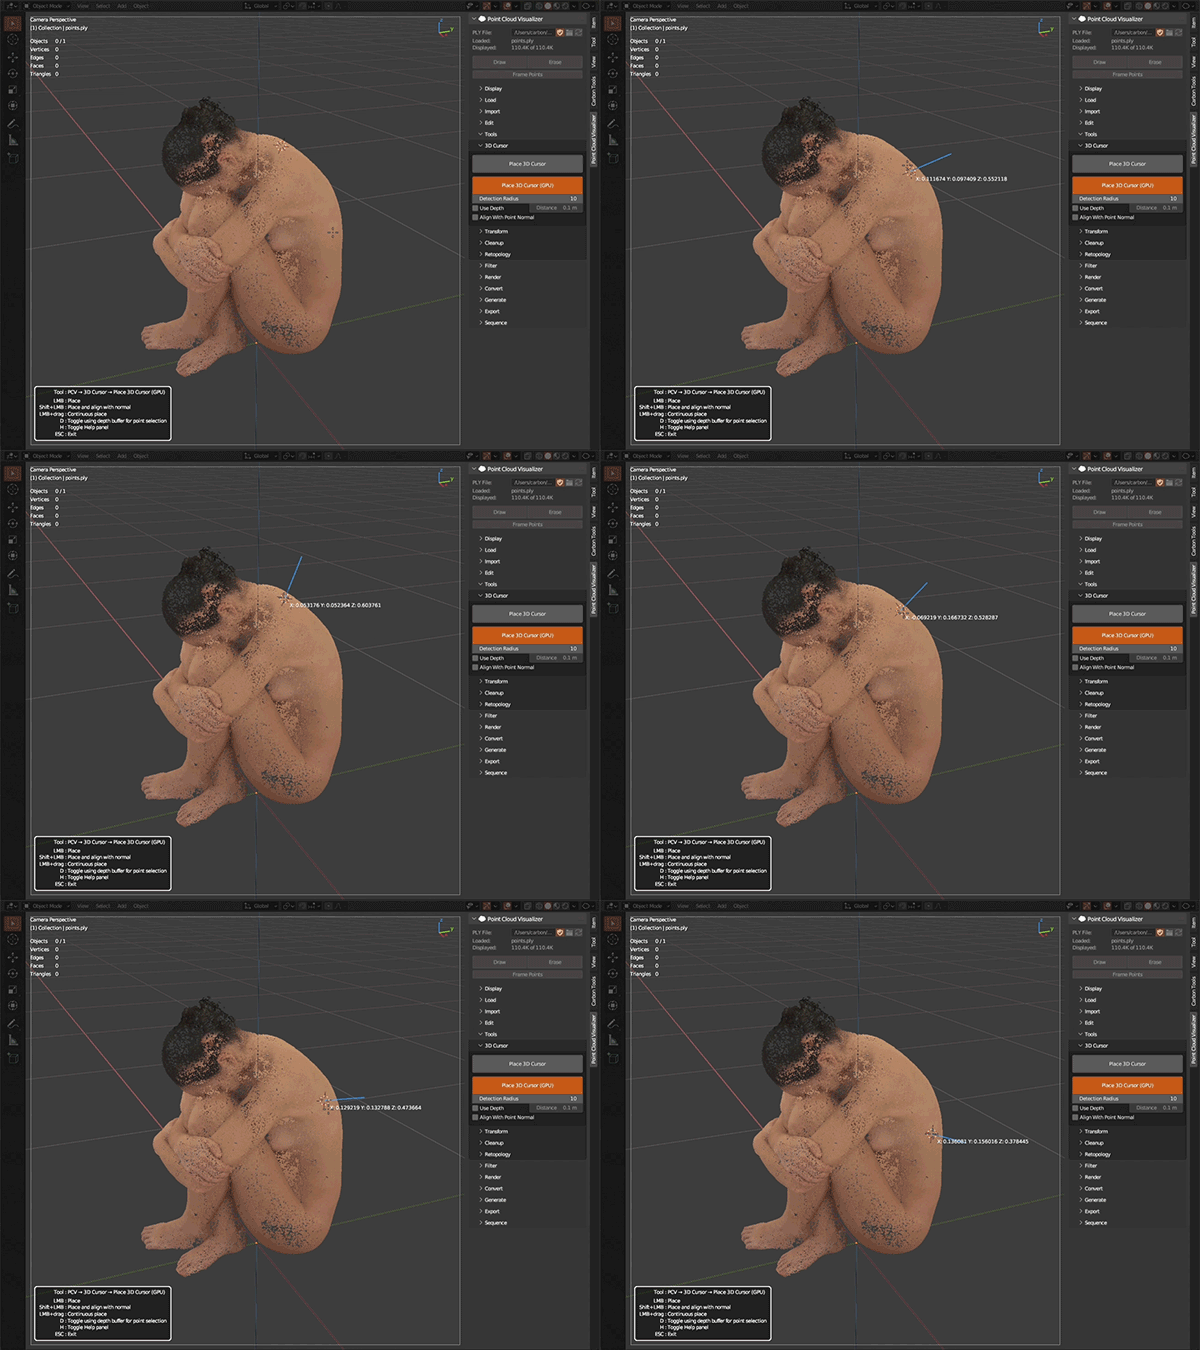
Place 3D Cursor on closest point in cloud under mouse cursor. GPU accelerated variant, faster on large datasets.
LMB: PlaceShift+LMB: Place and align with normalLMB+drag: Continuous placeD: Toggle using depth buffer for point selectionH: Toggle Help panelESC: Exit
Transform ^^
Transform tools operate on points container object. They will not modify points only container transformation in world coordinates.
Translate
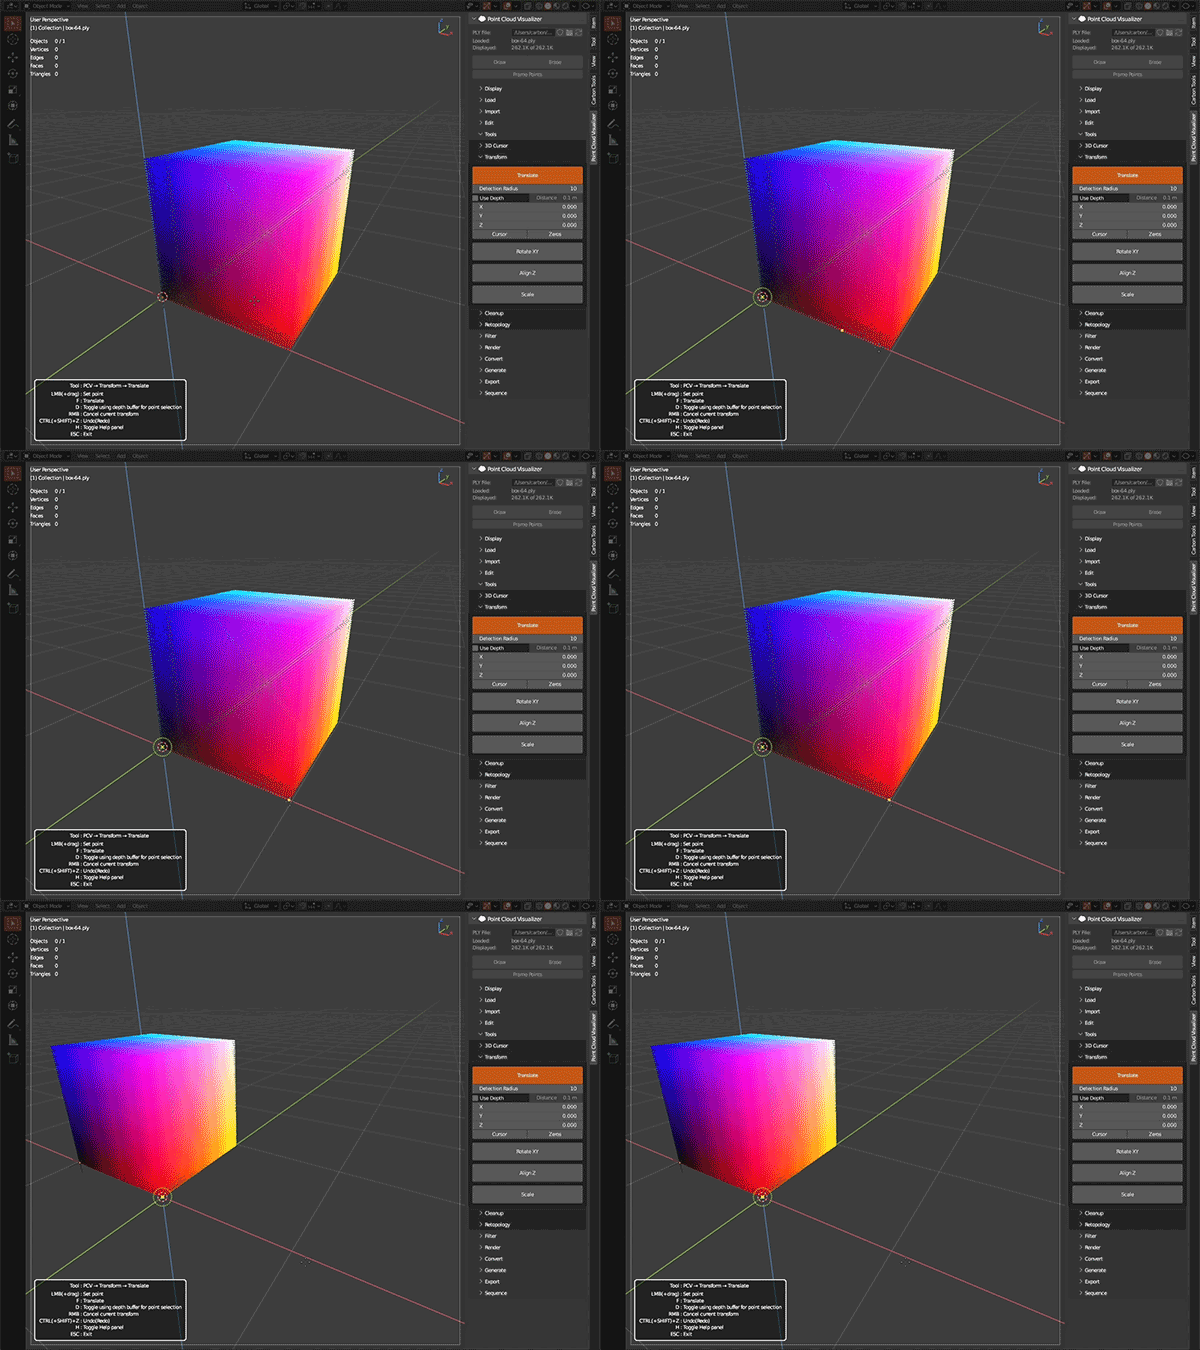
Translate points container so selected point is at chosen location.
LMB(+drag): Set pointF: TranslateD: Toggle using depth buffer for point selectionRMB: Cancel current transformCTRL(+SHIFT)+Z: Undo(Redo)H: Toggle Help panelESC: Exit
Rotate XY
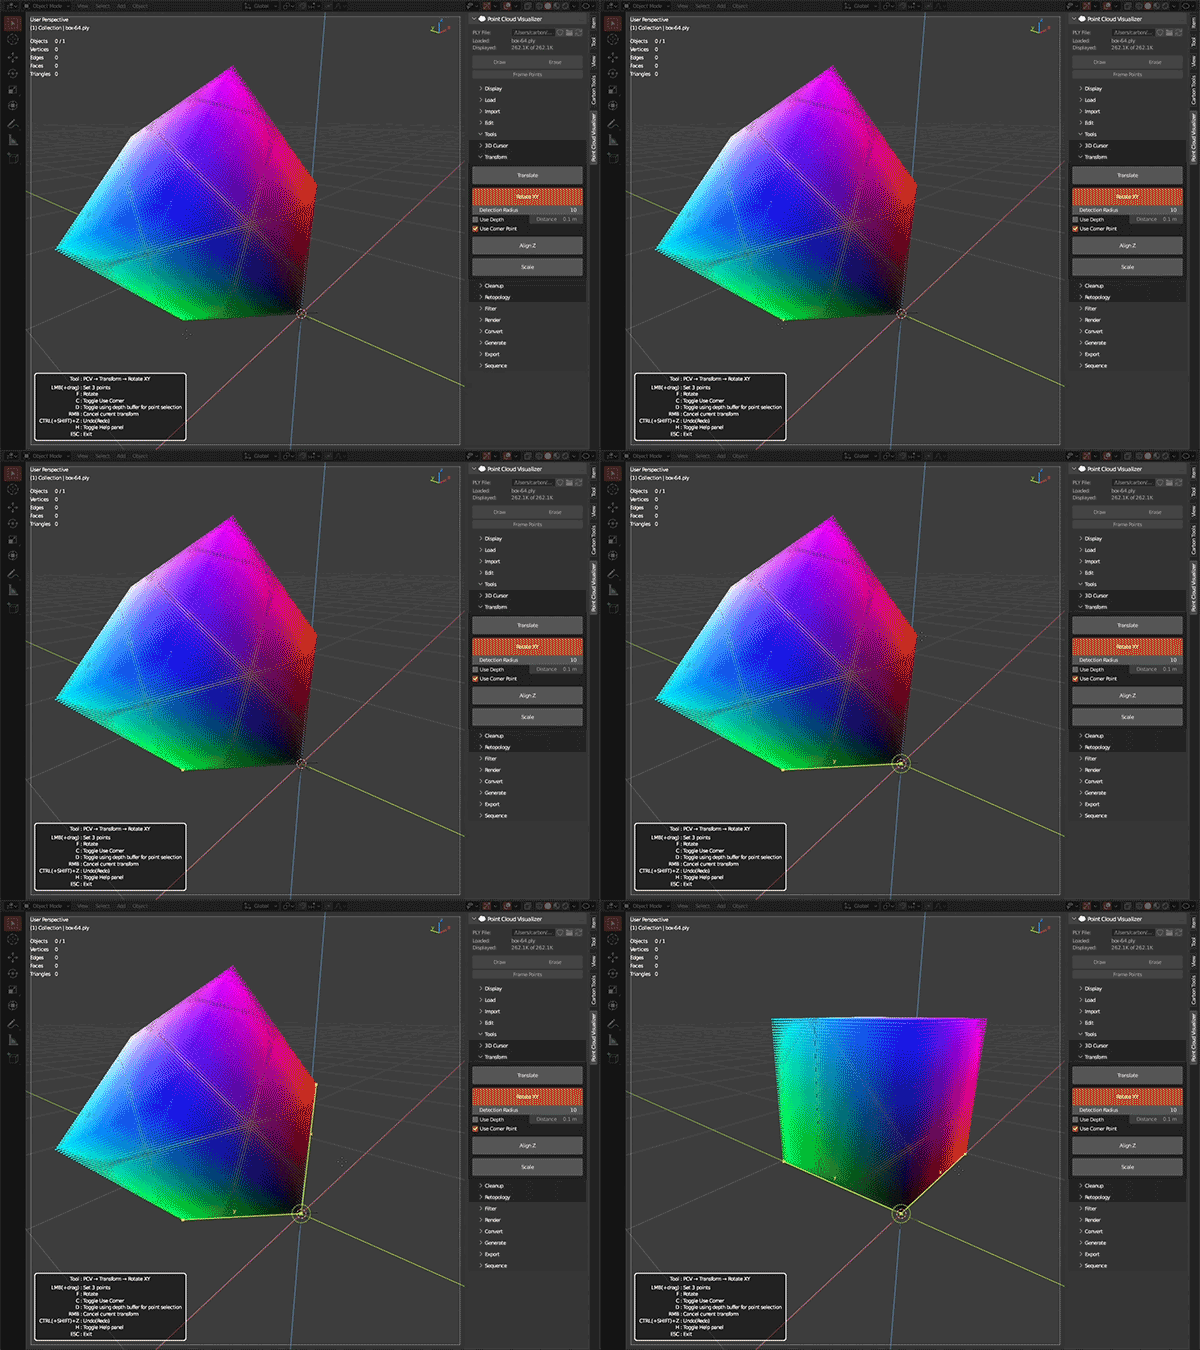
Rotate points container to align AB and BC lines between chosen 3 points and world Y and X axes.
LMB(+drag): Set 3 pointsF: RotateC: Toggle Use CornerD: Toggle using depth buffer for point selectionRMB: Cancel current transformCTRL(+SHIFT)+Z: Undo(Redo)H: Toggle Help panelESC: Exit
Align Z
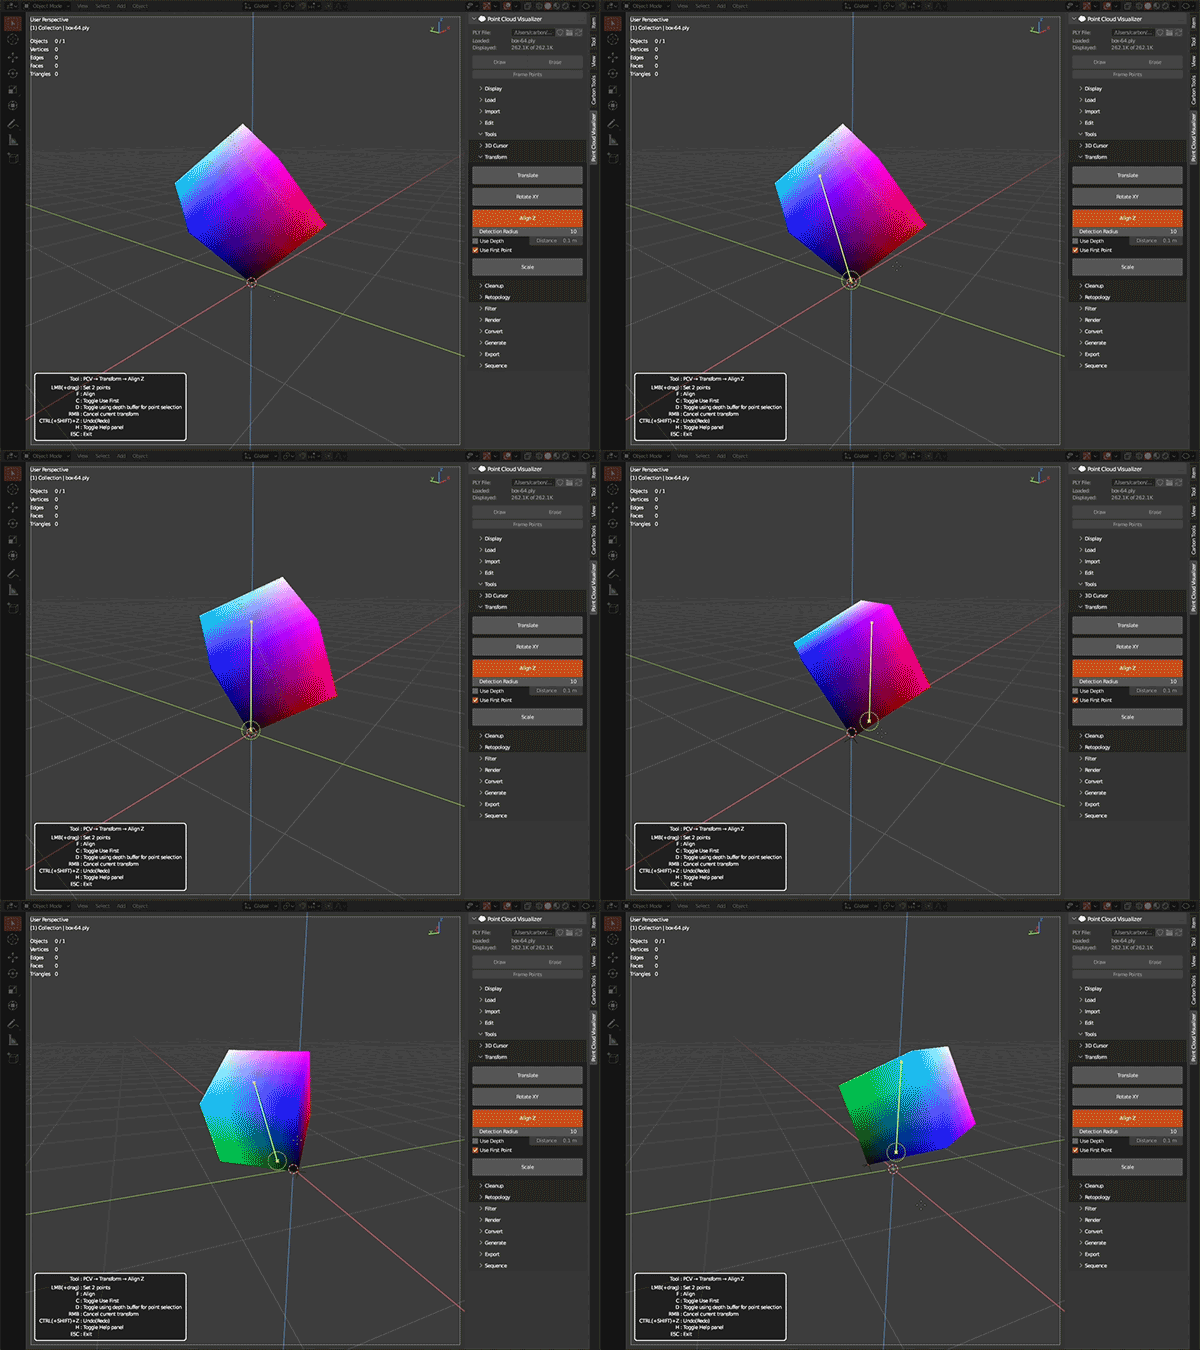
Rotate points container to align tow selected points with world Z axis.
LMB(+drag): Set 2 pointsF: AlignC: Toggle Use FirstD: Toggle using depth buffer for point selectionRMB: Cancel current transformCTRL(+SHIFT)+Z: Undo(Redo)H: Toggle Help panelESC: Exit
Scale
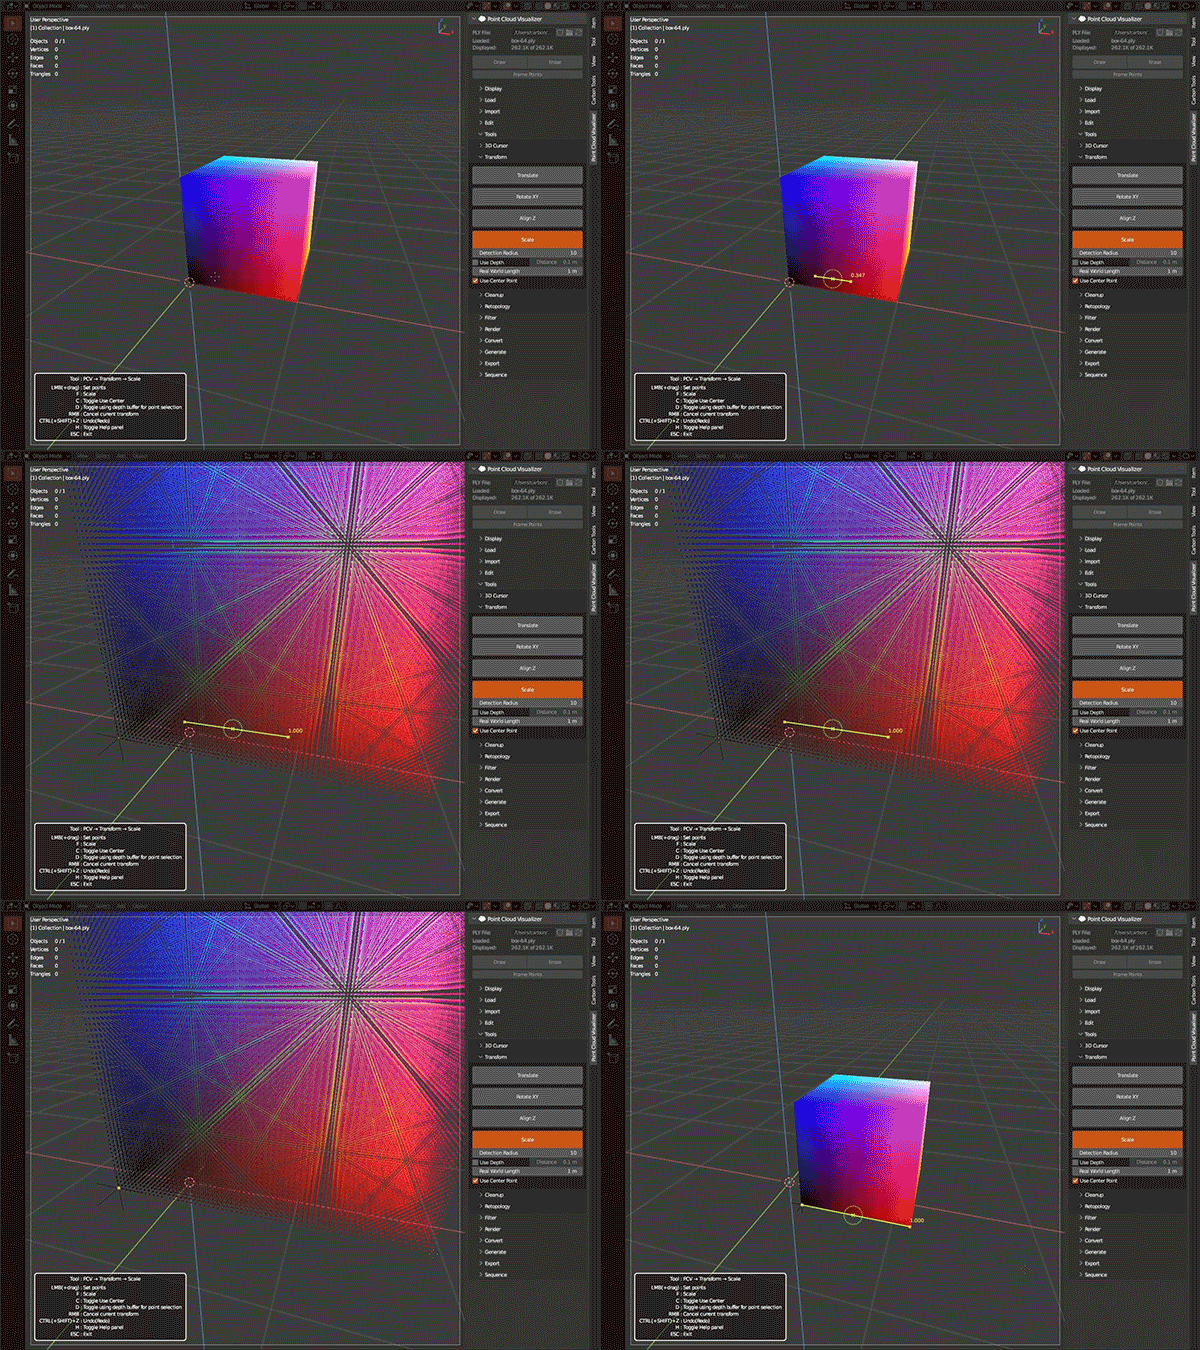
Scale points container to make length between two selected points equal chosen value.
LMB(+drag): Set pointsF: ScaleC: Toggle Use CenterD: Toggle using depth buffer for point selectionRMB: Cancel current transformCTRL(+SHIFT)+Z: Undo(Redo)H: Toggle Help panelESC: Exit
Cleanup ^^
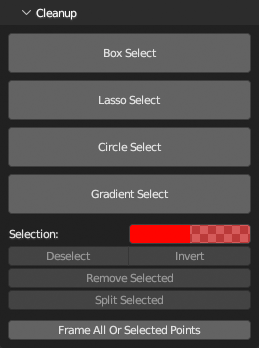
Cleanup tools will remove selected points from memory. If you need to save edits, export as ply after you are finished with cleanup.
Box Select
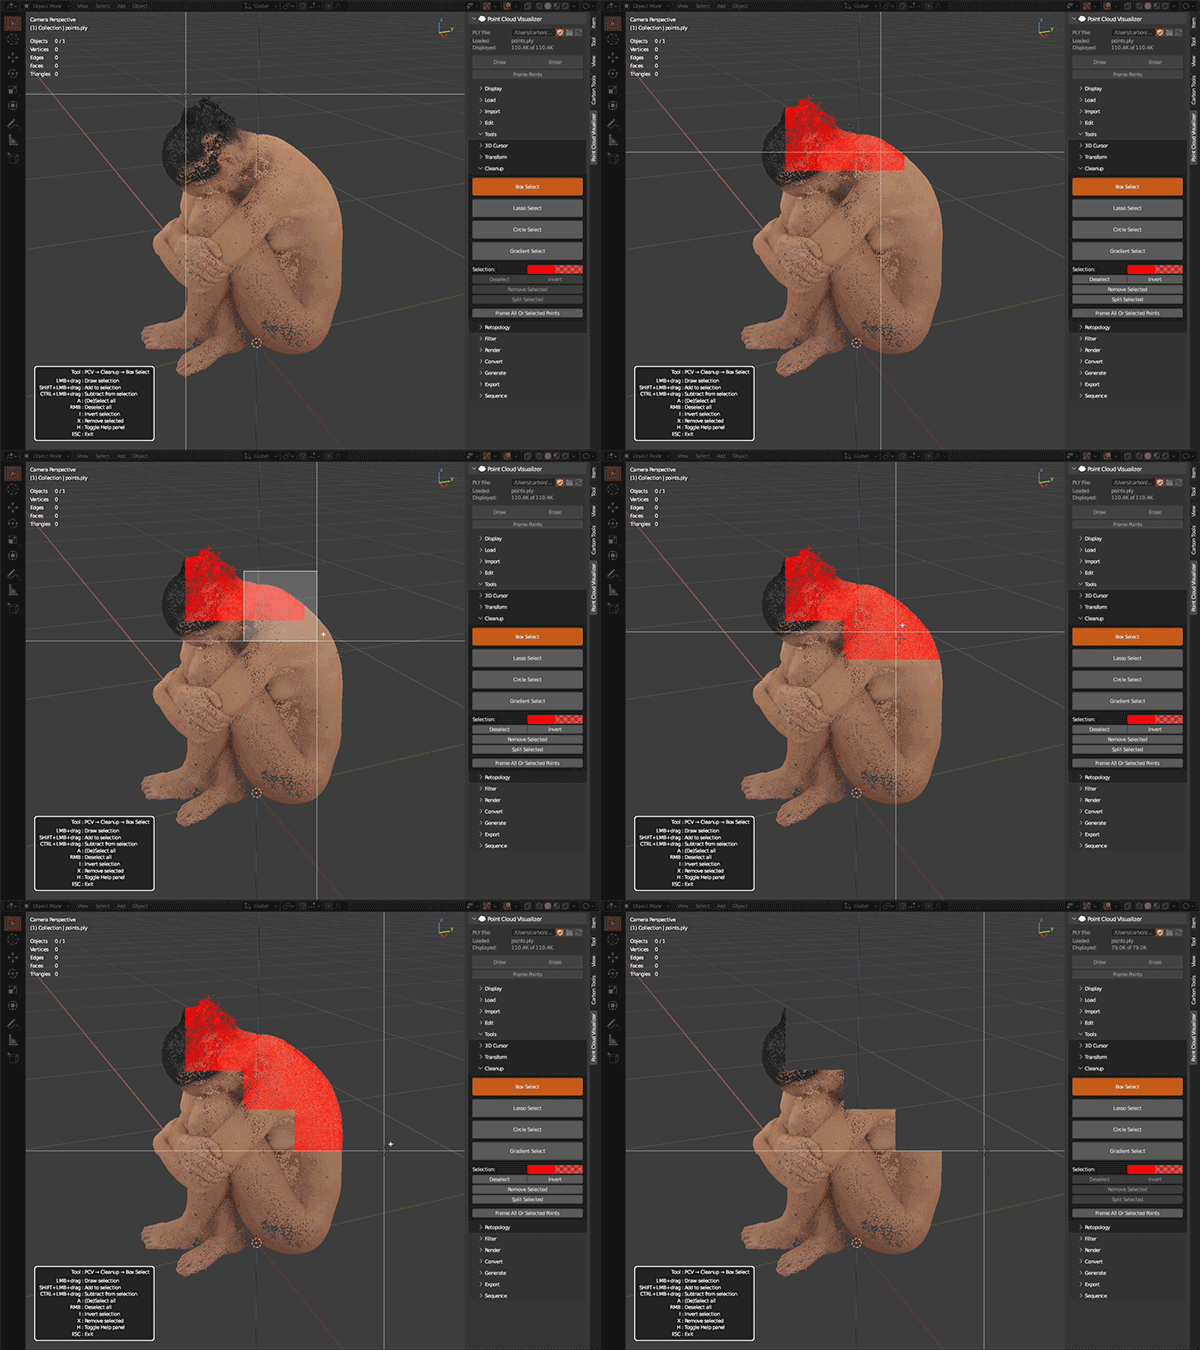
Select points using box selection.
LMB+drag: Draw selectionSHIFT+LMB+drag: Add to selectionCTRL+LMB+drag: Subtract from selectionA: (De)Select allRMB: Deselect allI: Invert selectionX: Remove selectedH: Toggle Help panelESC: Exit
Lasso Select
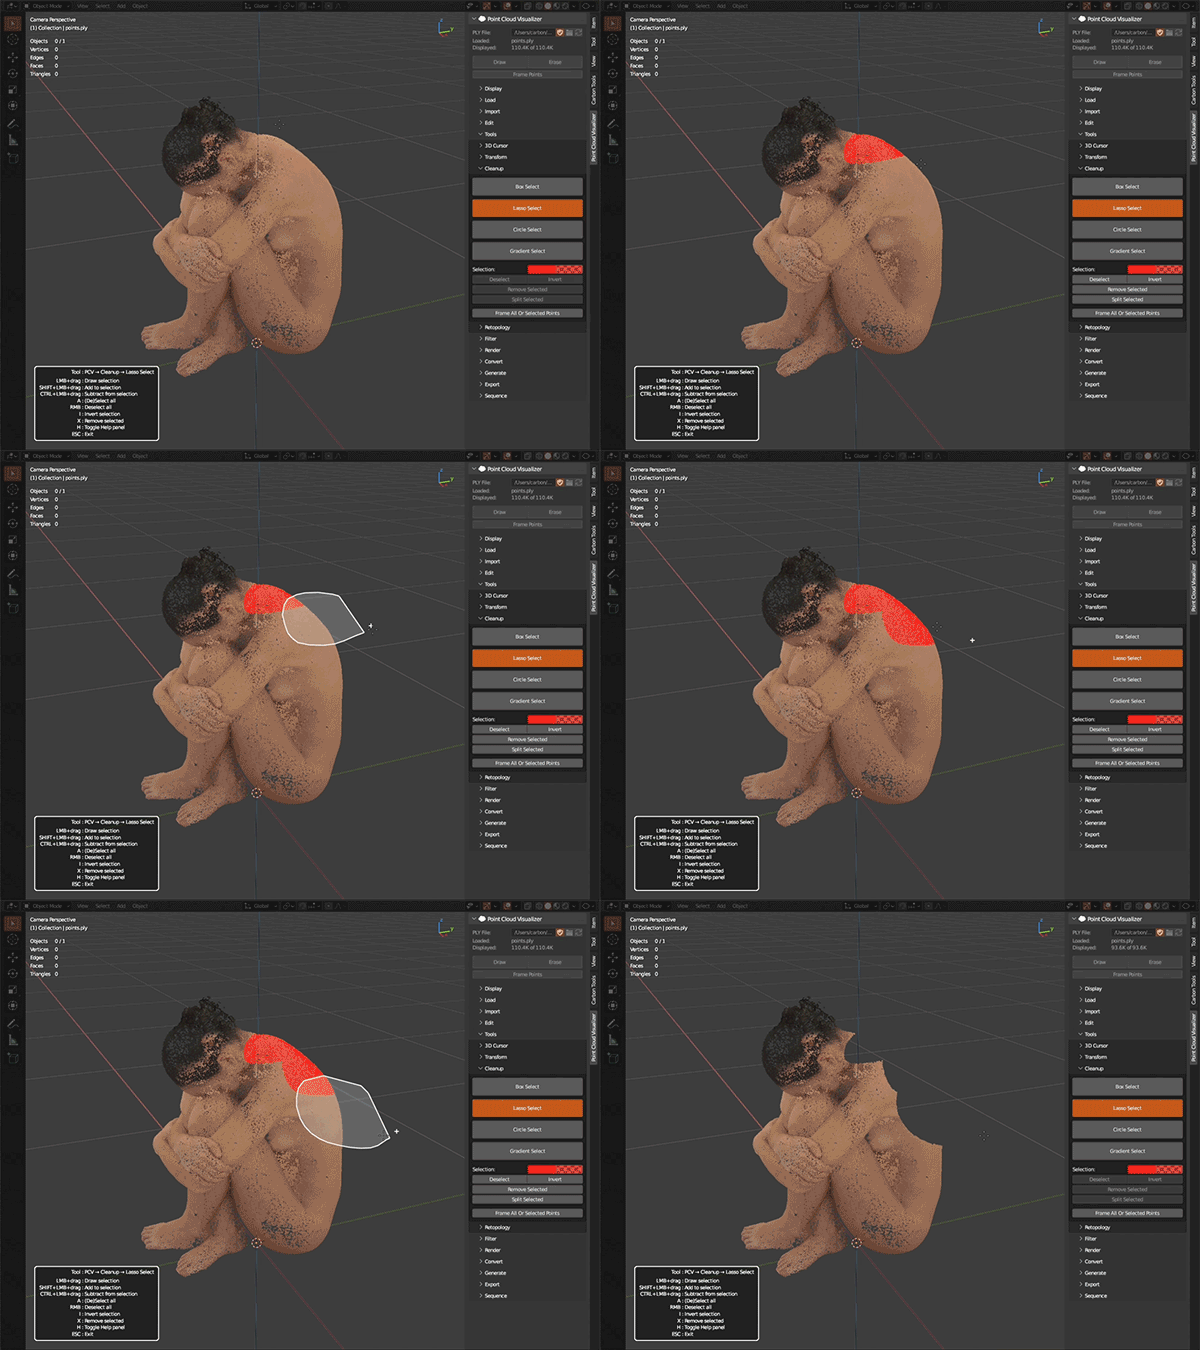
Select points using lasso selection.
LMB+drag: Draw selectionSHIFT+LMB+drag: Add to selectionCTRL+LMB+drag: Subtract from selectionA: (De)Select allRMB: Deselect allI: Invert selectionX: Remove selectedH: Toggle Help panelESC: Exit
Circle Select
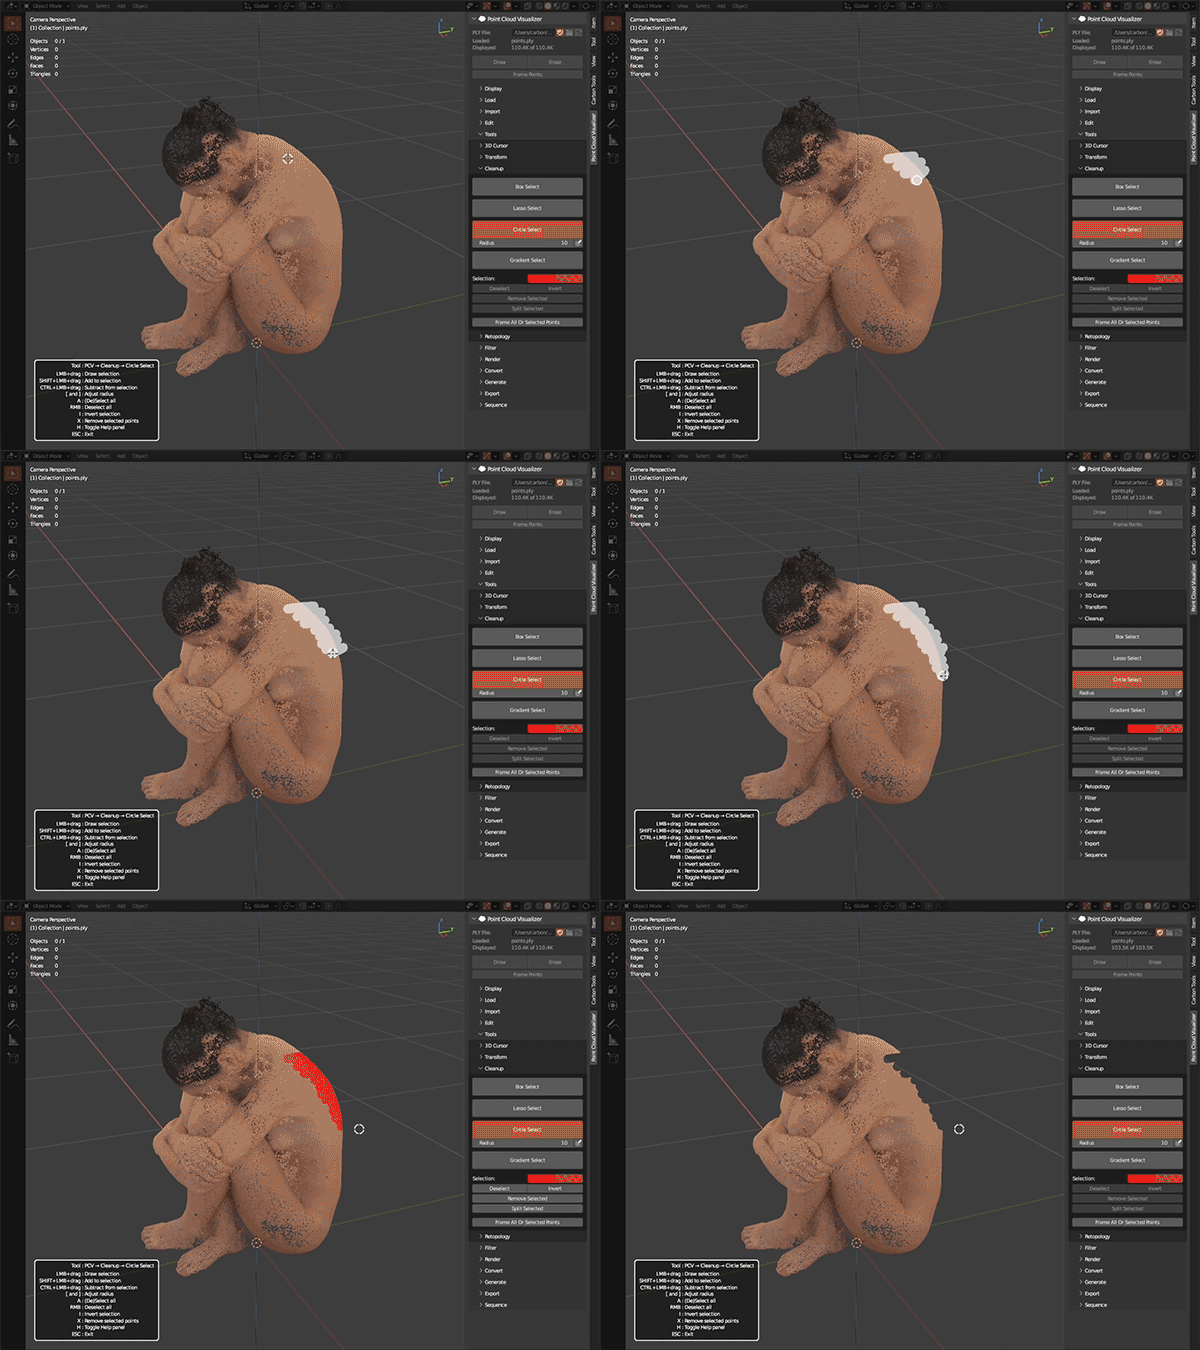
Select points using circle selection.
LMB+drag: Draw selectionSHIFT+LMB+drag: Add to selectionCTRL+LMB+drag: Subtract from selection[and]: Adjust radiusA: (De)Select allRMB: Deselect allI: Invert selectionX: Remove selected pointsH: Toggle Help panelESC: Exit
Gradient Select
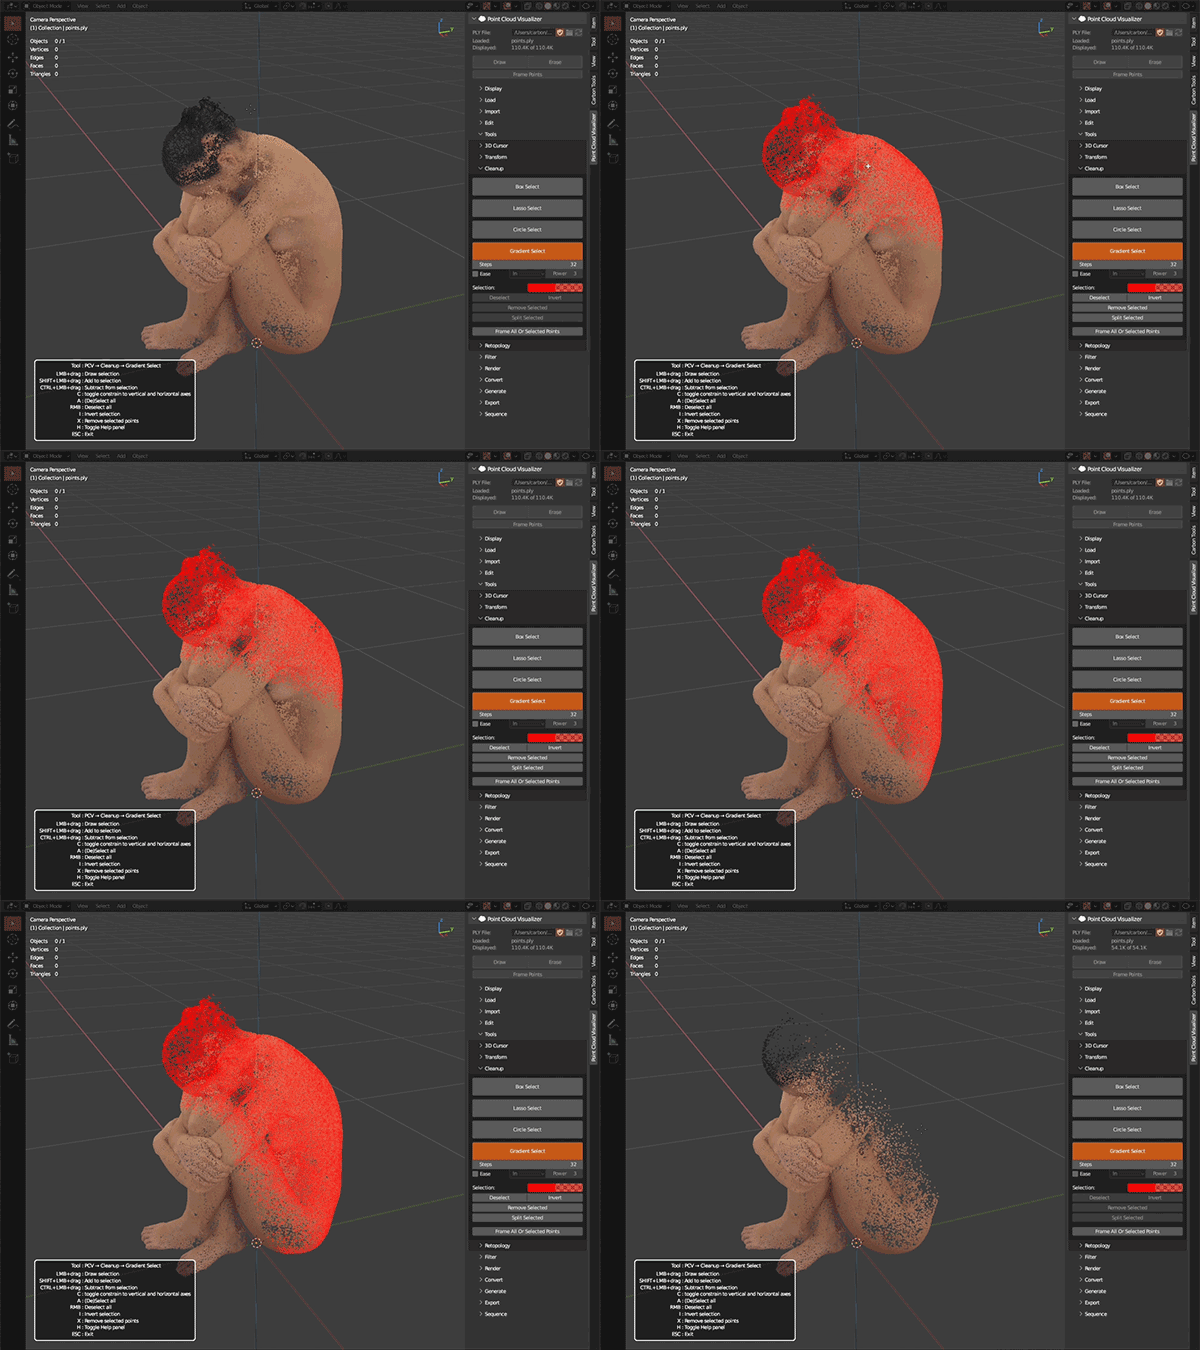
Select points using gradient selection.
LMB+drag: Draw selectionSHIFT+LMB+drag: Add to selectionCTRL+LMB+drag: Subtract from selectionC: toggle constrain to vertical and horizontal axesA: (De)Select allRMB: Deselect allI: Invert selectionX: Remove selected pointsH: Toggle Help panelESC: Exit
Retopology ^^
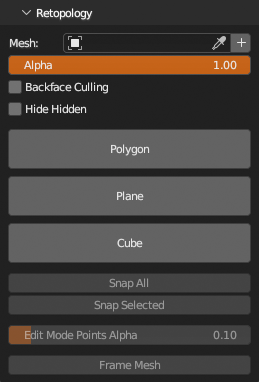
Retopology tools operate on separate mesh object. You can create one before running tool or create new at any time while tool is running.
For better mesh visibility while any Retopology tool is running, target mesh is hidden from viewport and drawn on top of points with custom shaders.
All Retopology tools allow switching to Blender Mesh Edit mode at any time for using Blender tools. When edit mode is exited, initial Retopology tool will be restored. In short, TAB into mesh edit mode, do what is needed, TAB back to initial Retopology tool to continue.
Polygon
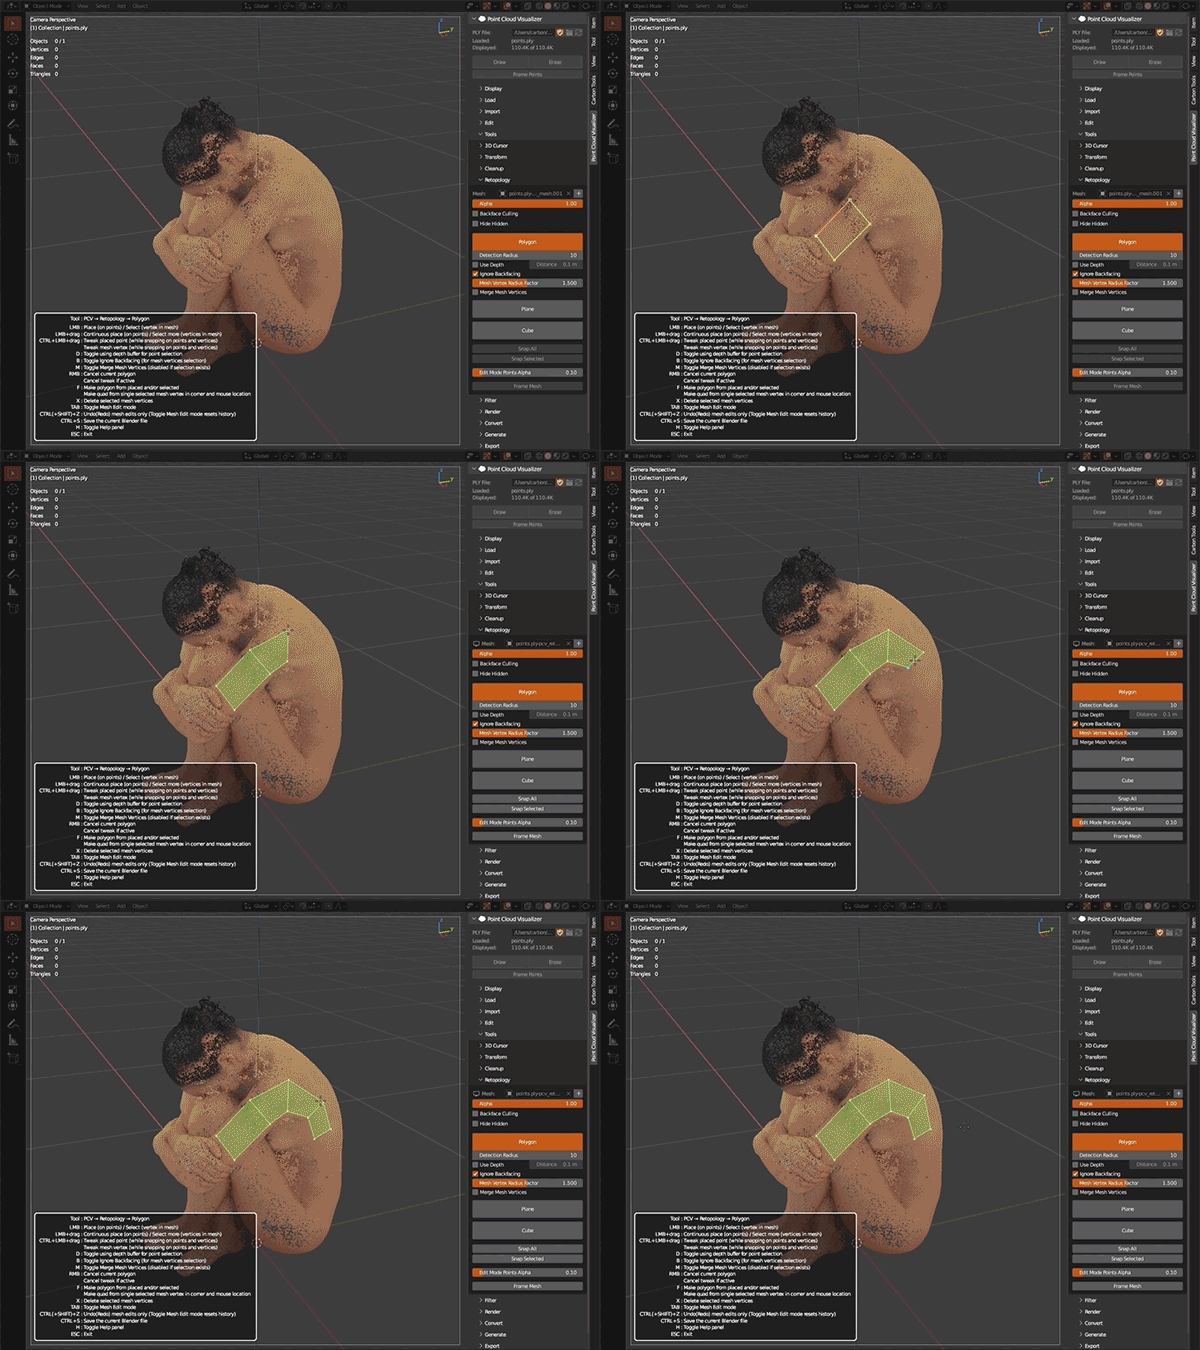
Draw polygons while snapping vertices on points or existing vertices in target mesh.
LMB: Place (on points) / Select (vertex in mesh)LMB+drag: Continuous place (on points) / Select more (vertices in mesh)CTRL+LMB+drag: Tweak placed point (while snapping on points and vertices) / Tweak mesh vertex (while snapping on points and vertices)D: Toggle using depth buffer for point selectionB: Toggle Ignore Backfacing (for mesh vertices selection)M: Toggle Merge Mesh Vertices (disabled if selection exists)RMB: Cancel current polygon / Cancel tweak if activeF: Make polygon from placed and/or selected / Make quad from single selected mesh vertex in corner and mouse locationX: Delete selected mesh verticesTAB: Toggle Mesh Edit modeCTRL(+SHIFT)+Z: Undo(Redo) mesh edits only (Toggle Mesh Edit mode resets history)CTRL+S: Save the current Blender fileH: Toggle Help panelESC: Exit
Plane
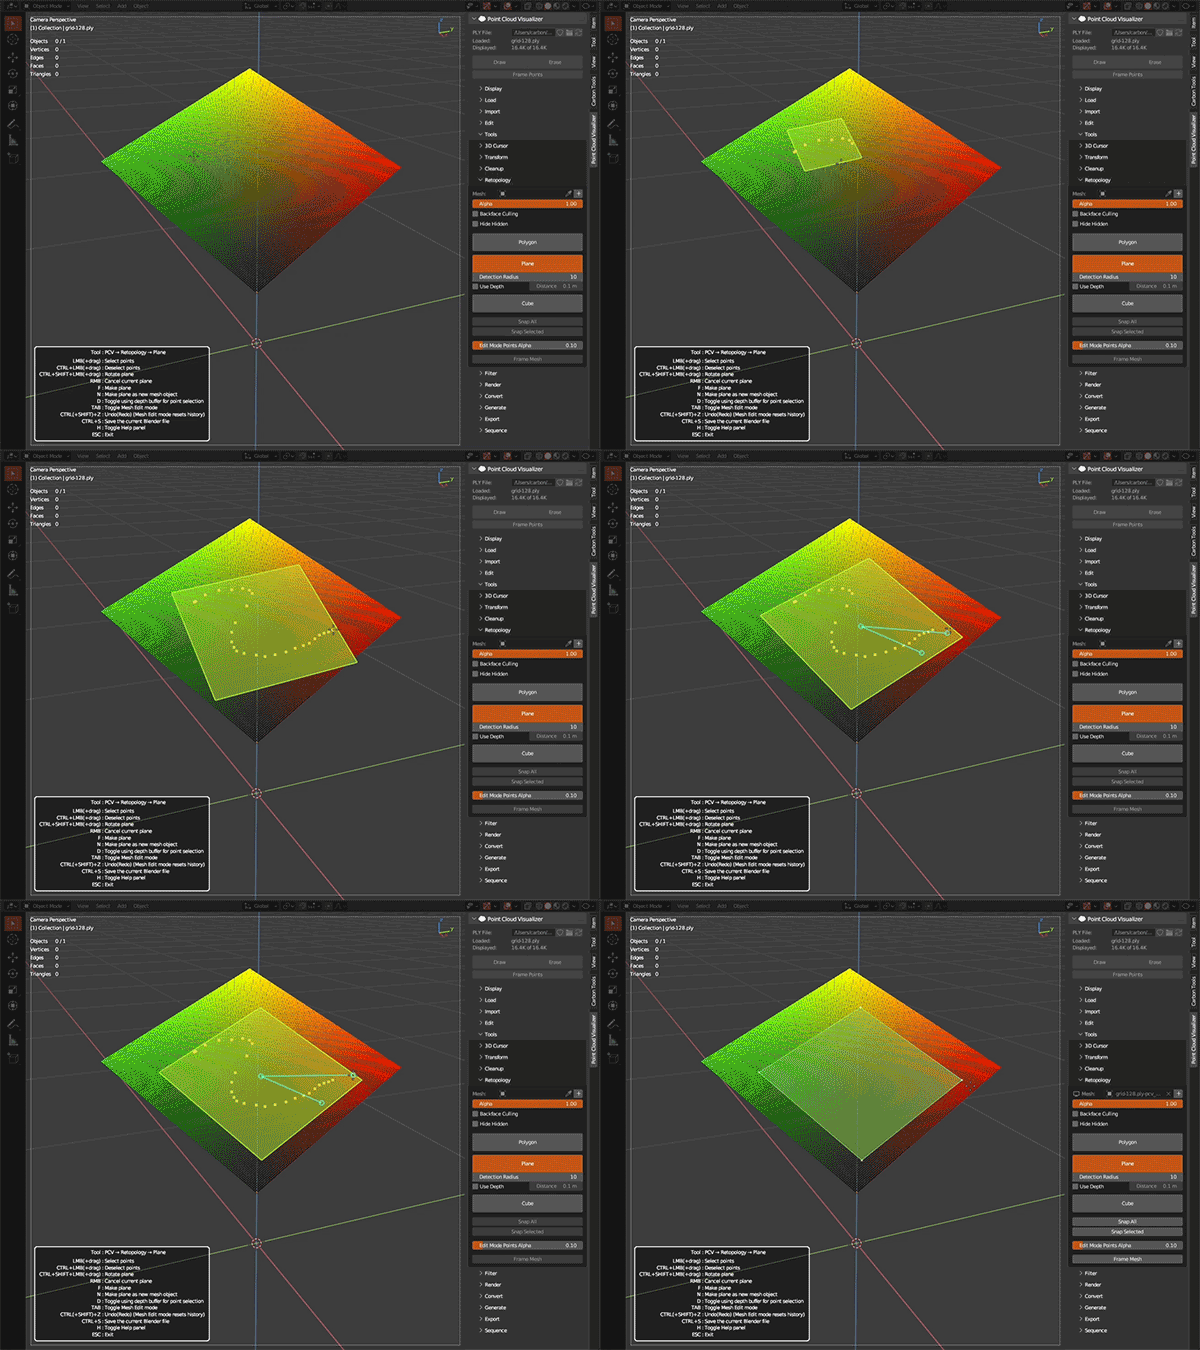
Make quad plane rotated to fit selected points.
LMB(+drag): Select pointsCTRL+LMB(+drag): Deselect pointsCTRL+SHIFT+LMB(+drag): Rotate planeRMB: Cancel current planeF: Make planeN: Make plane as new mesh objectD: Toggle using depth buffer for point selectionTAB: Toggle Mesh Edit modeCTRL(+SHIFT)+Z: Undo(Redo) (Mesh Edit mode resets history)CTRL+S: Save the current Blender fileH: Toggle Help panelESC: Exit
Cube
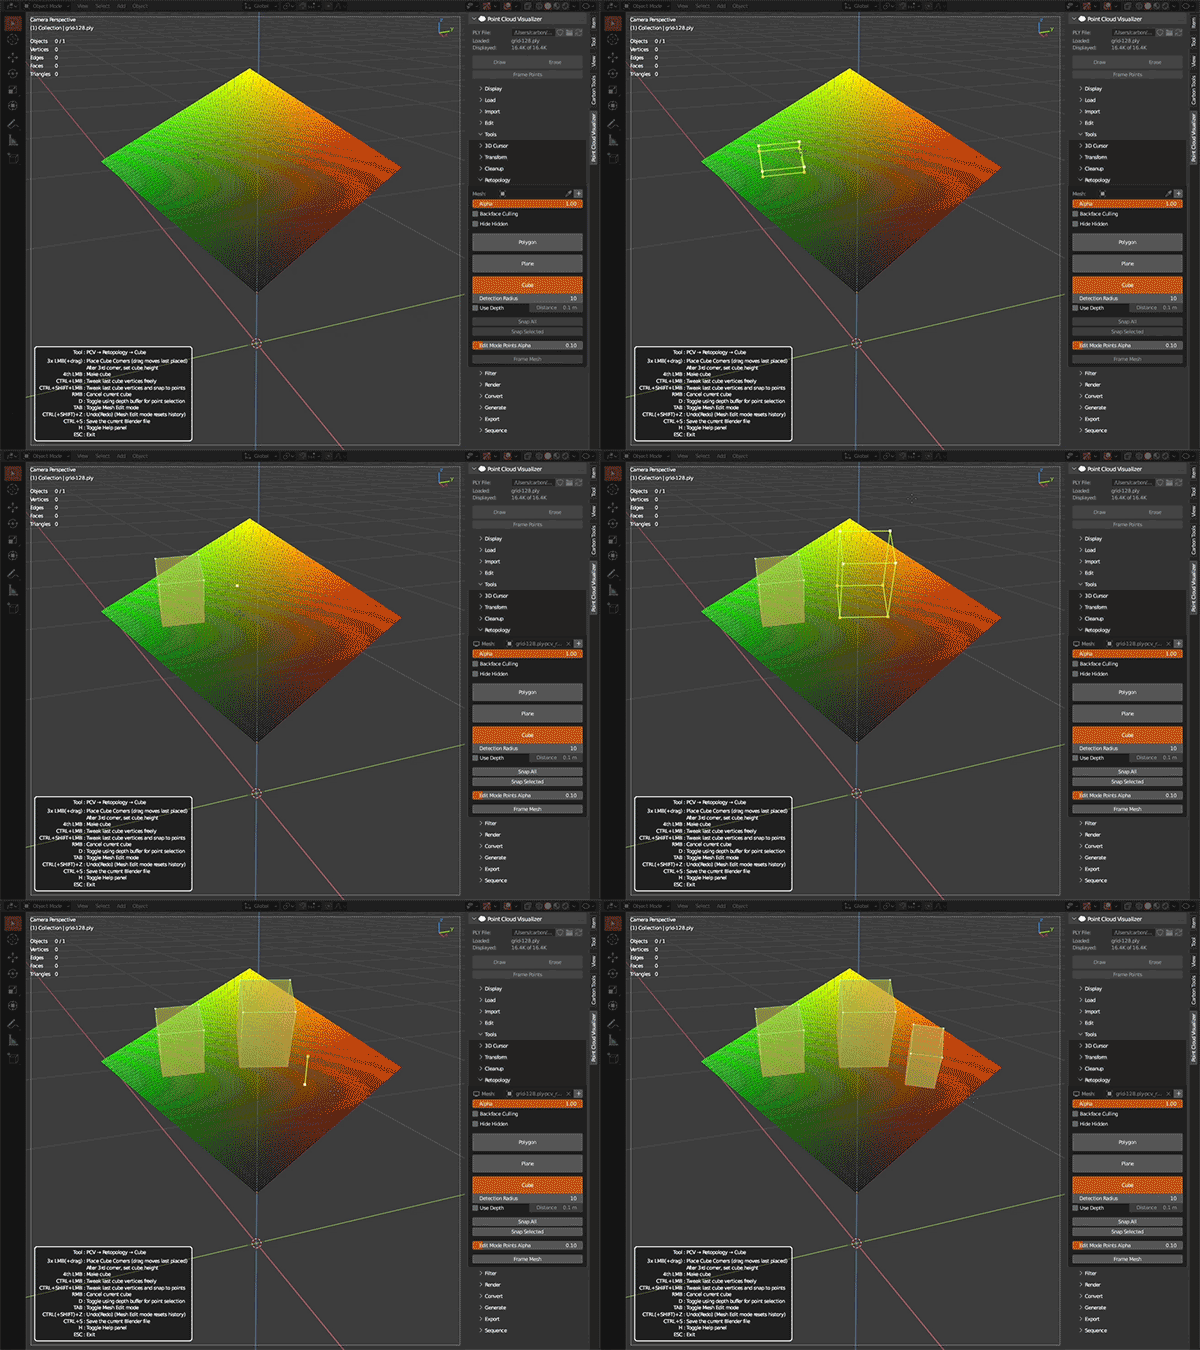
Draw Cube alias Rectangular Cuboid snapped to points by setting three initial corners and arbitrary height.
- 3x
LMB(+drag): Place Cube Corners (drag moves last placed) - After 3rd corner, set cube height
- 4th
LMB: Make cube CTRL+LMB: Tweak last cube vertices freelyCTRL+SHIFT+LMB: Tweak last cube vertices and snap to pointsRMB: Cancel current cubeD: Toggle using depth buffer for point selectionTAB: Toggle Mesh Edit modeCTRL(+SHIFT)+Z: Undo(Redo) (Mesh Edit mode resets history)CTRL+S: Save the current Blender fileH: Toggle Help panelESC: Exit
Filter ^^
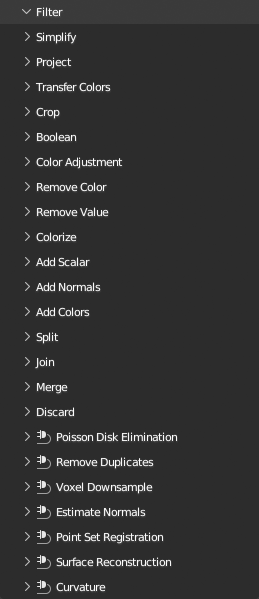
Simplify ^^
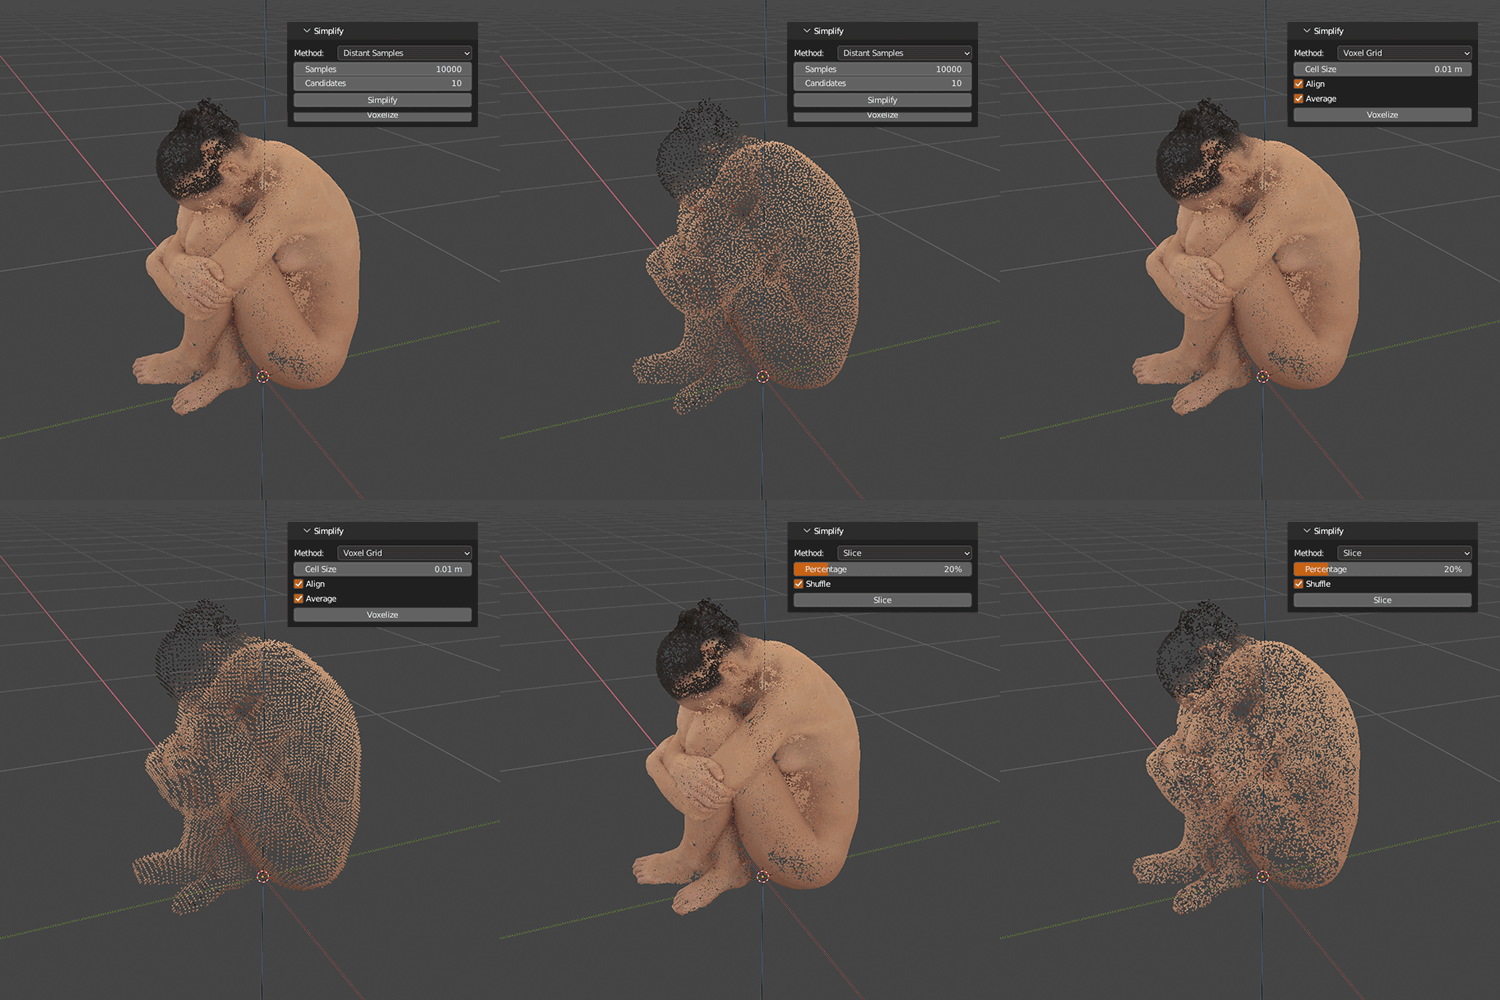
Reduce number of points. There are four methods, Slice removes points the same way as Display > Percentage slider does, Distant Samples takes random point, then number random candidates, accepts the most distant of them from already accepted, repeat. Result is nice and even, but algorithm is very slow. Voxel Grid covers points with 3d grid, then takes single point from each cell. Can optionally align points to grid. Voxel Grid v2 is faster variant with more options and eventually will replace former variant.
Project ^^
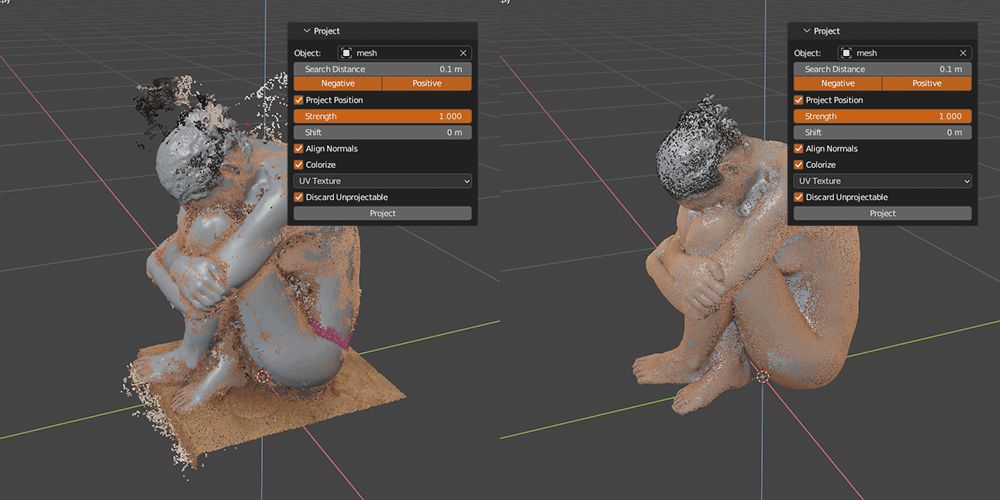
Projects points along their normals (backwards, forwards or both) on mesh surface. Points can be moved to hit location, their normal can be replaced with surface normal and points can be colorized by mesh uv texture, vertex color or vertex group, all of these properties can be enabled individually. Can also discard points that can’t be projected.
Transfer Colors ^^
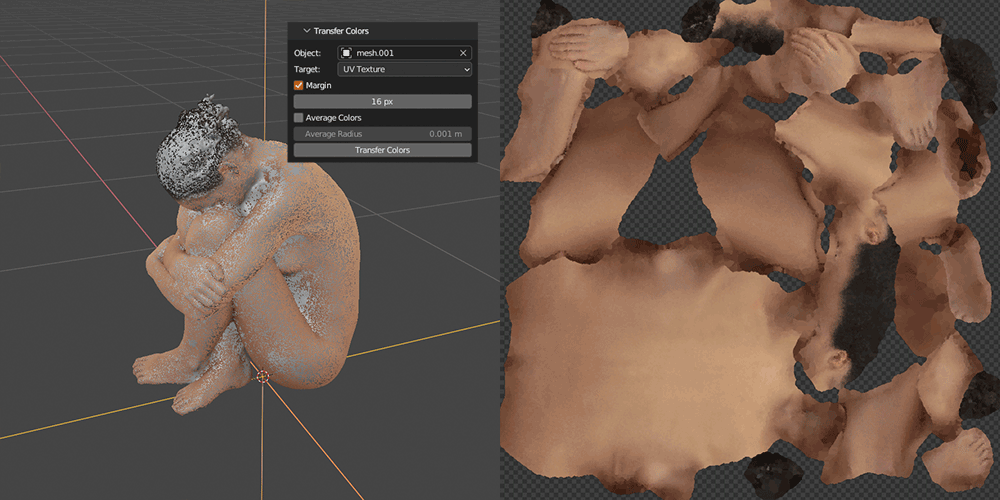
Transfer colors from points to mesh object vertex colors or uv texture. By default, color is taken from closest point, optionally you can average point colors in some radius. Transfer colors to UV texture requires non-overlapping UV layout fully contained in unit square on target mesh and material with active Image Texture node with loaded image to operate on. Extending margins on UV texture uses Blender baking system and requires Cycles to be set as render engine.
Crop ^^
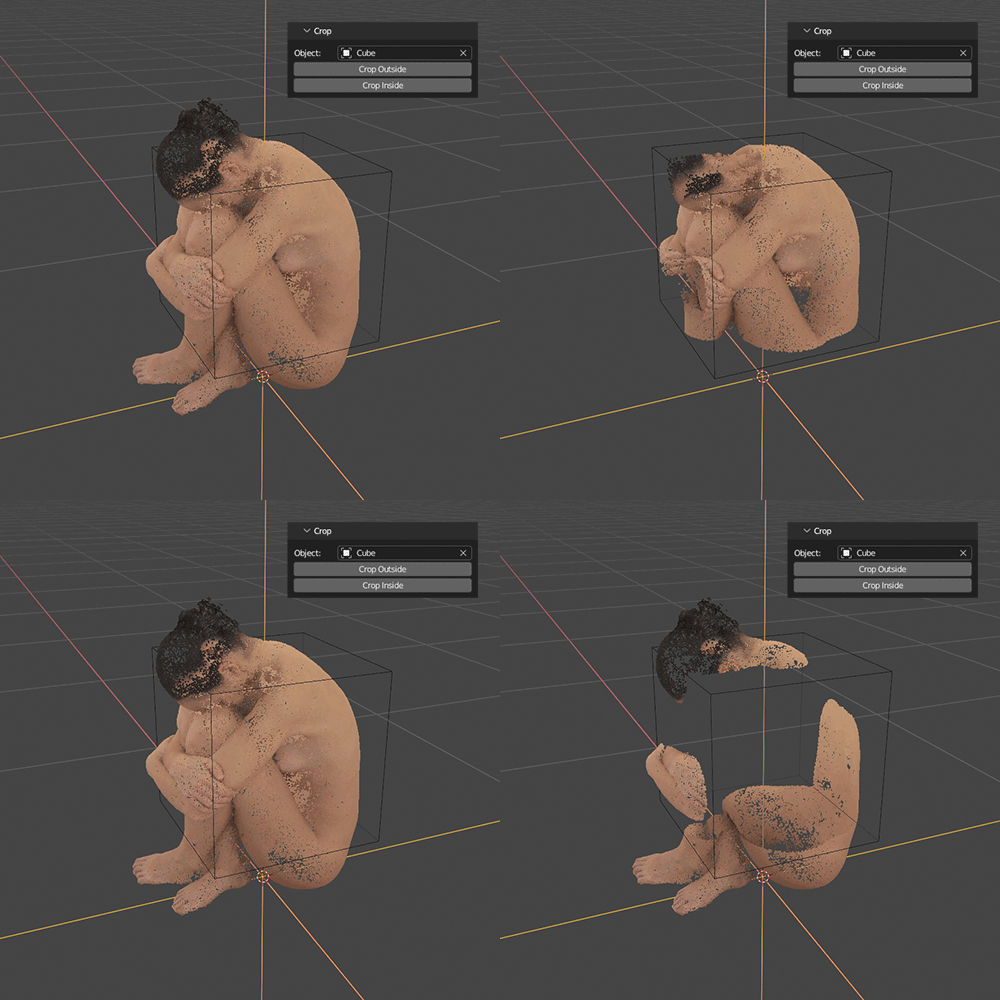
Fast crop points by object bounding box. Crop points inside bounding box or outside.
Boolean ^^
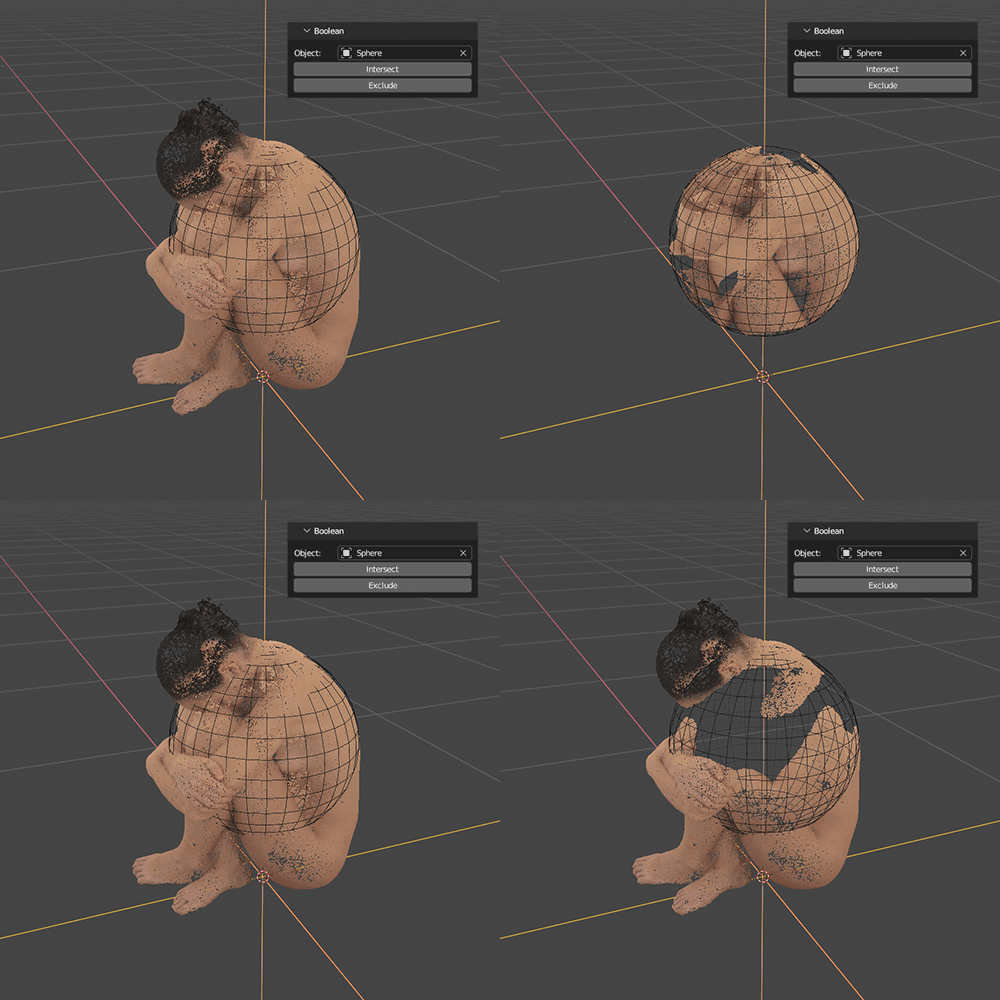
Intersect or Exclude points with mesh object. Mesh have to be non-manifold.
Color Adjustment ^^
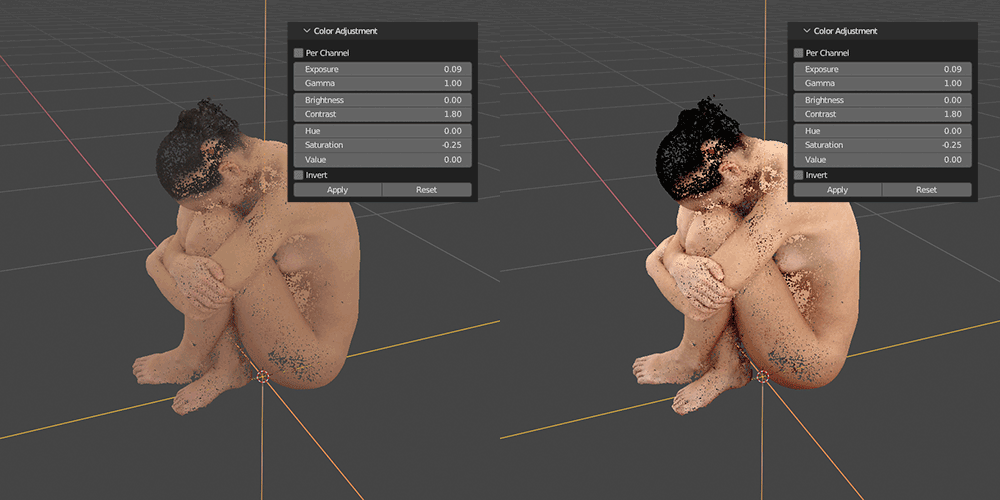
Adjust points colors with Exposure, Gamma, Brightness, Contrast, Hue, Saturation, Value and Invert controls. For fast viewport preview uses Color Adjustment shader, need to be applied with Apply button to point data.
Remove Color ^^
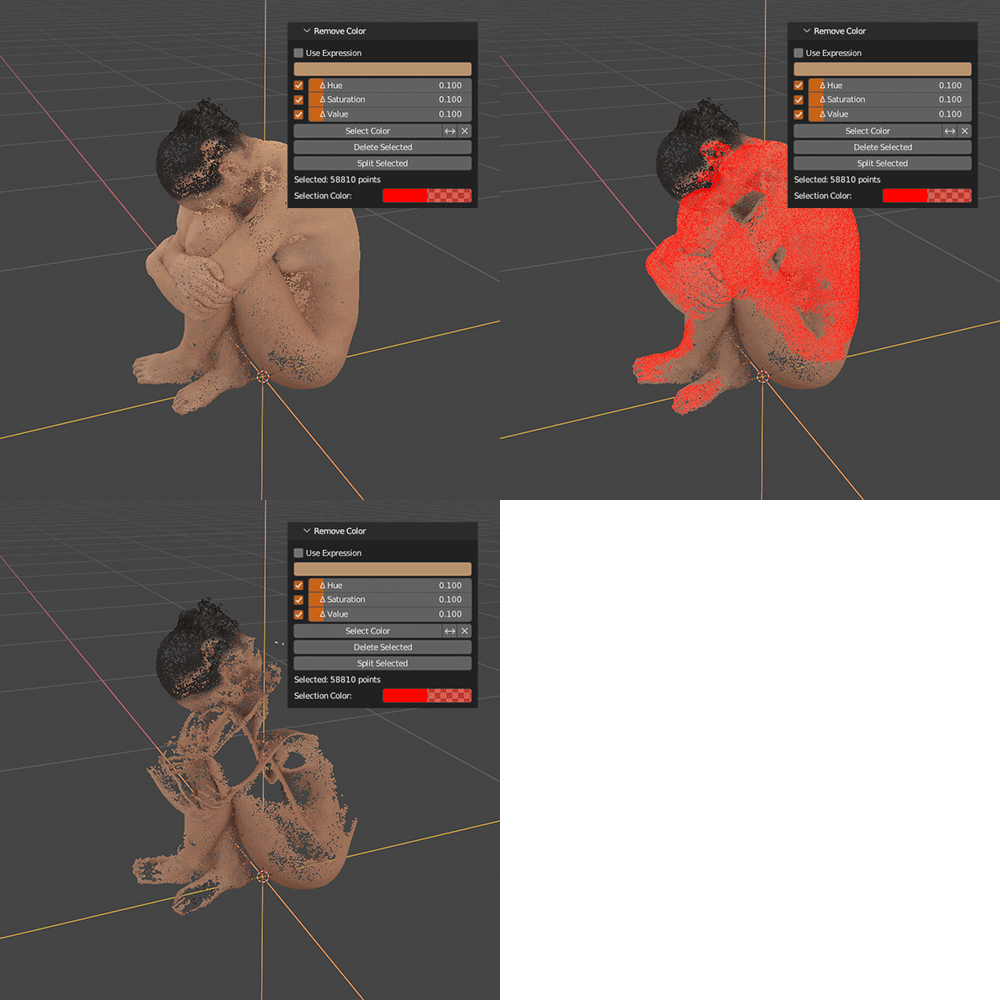
Select points by color sampled from viewport or by numeric values. Selected points can be removed or split to new PCV instance.
Remove Value ^^
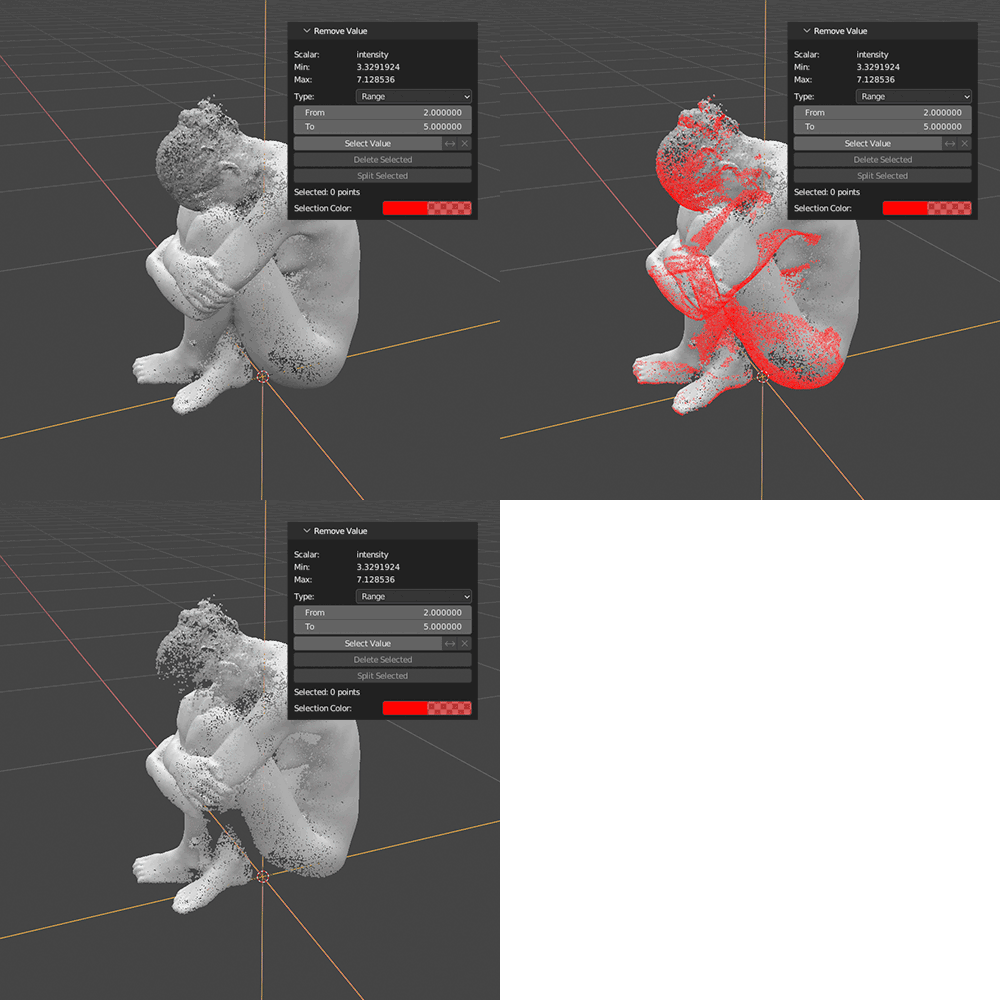
Select points by scalar value. Selected points can be removed or split to new PCV instance.
Colorize ^^
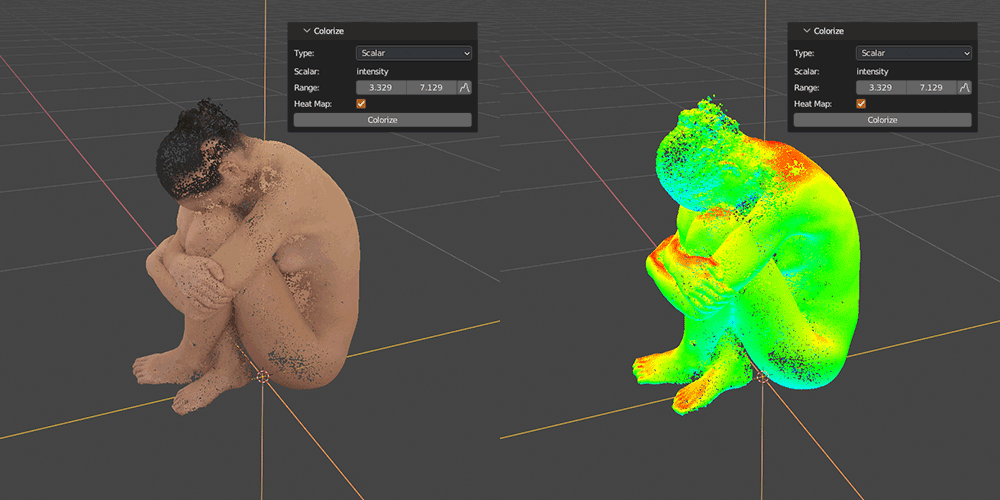
Colorize points by scalar value, grayscale or heat map false colors.
Add Scalar ^^
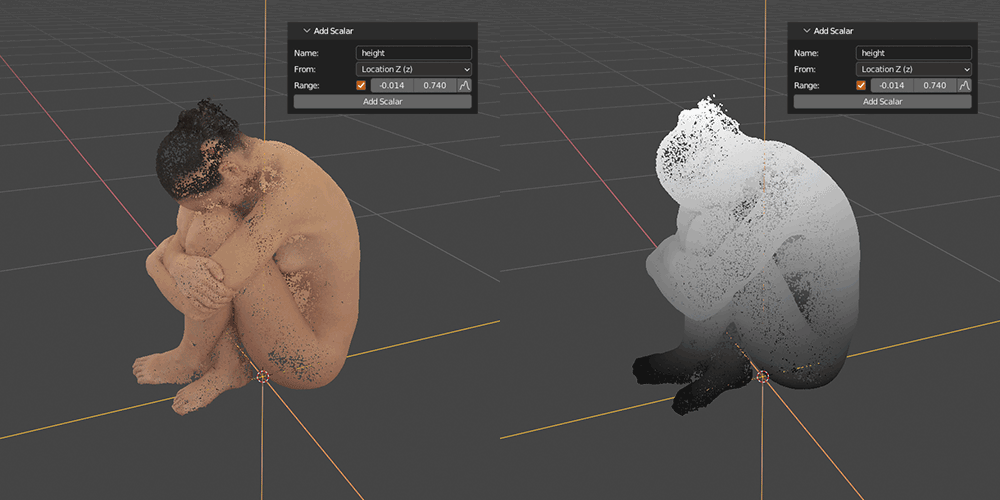
Create scalar value on points from other point properties.
Add Normals ^^
Recreate point normals from three scalar values. Handy when loaded data does not define known normals format and their values are read as regular scalar values.
Add Colors ^^
Recreate point colors from three (or four) scalar values. Handy when loaded data does not define known colors format and their values are read as regular scalar values.
Split ^^
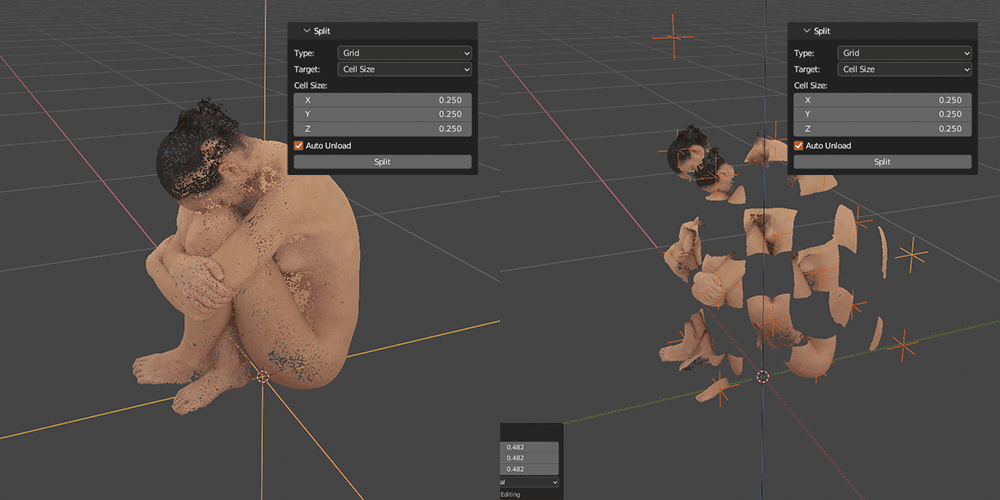
Split points to multiple PCV instances. Points can be split to Grid, or by point Count per instance or to several Pieces with roughly same point count.
Join ^^
Join selected PCV instances to one.
Merge ^^
Merge points with other PLY file.
Discard ^^
Discard normals, colors or scalars from points.
Poisson Disk Elimination ^^
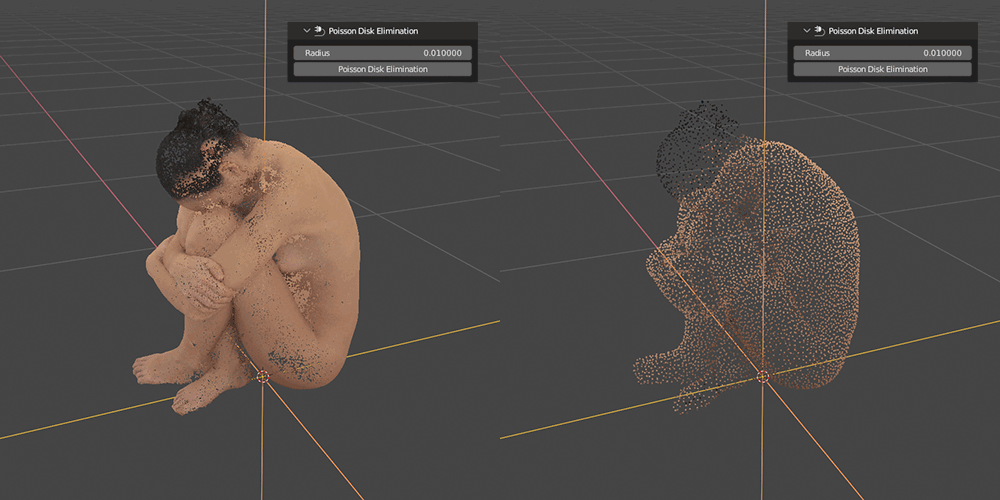
Fast poisson disk downsampling, discard points that are within other point radius.
Remove Duplicates ^^
Remove points by distance to other points.
Voxel Downsample ^^
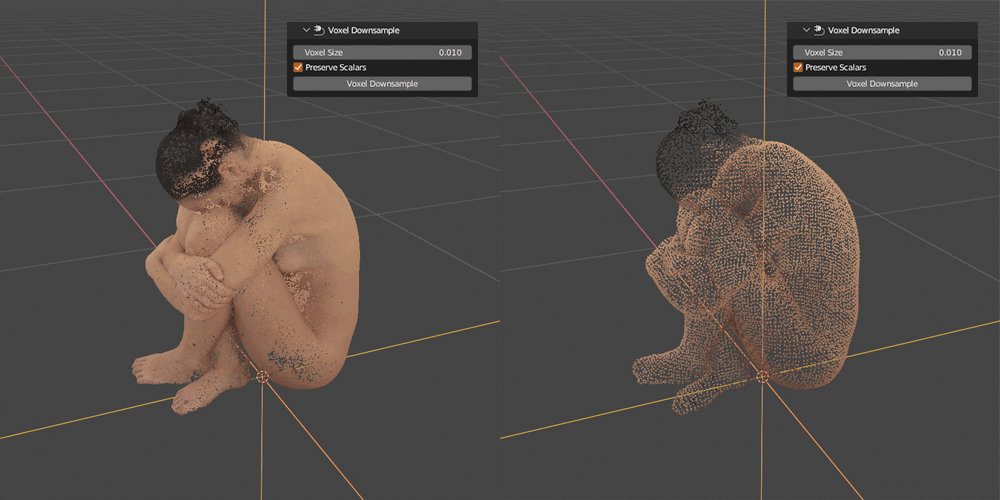
Voxel downsampling uses a regular voxel grid to create a uniformly downsampled point cloud from an input point cloud.
Estimate Normals ^^
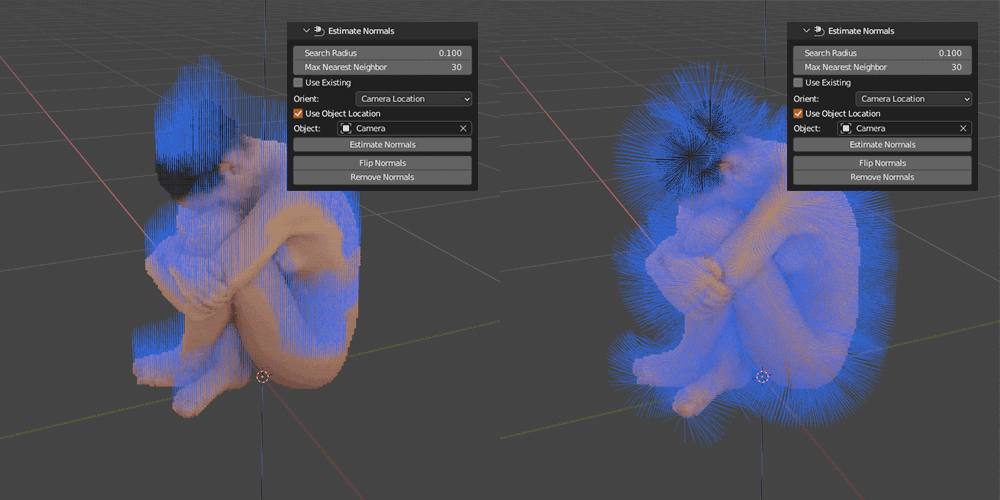
Compute normals on points. If there are no normals on points, for correct result orientation, Orient have to be set. If there are normals, Use Existing is enabled and Orient is None, normals will be only averaged in radius and result will be smoother.
Point Set Registration ^^
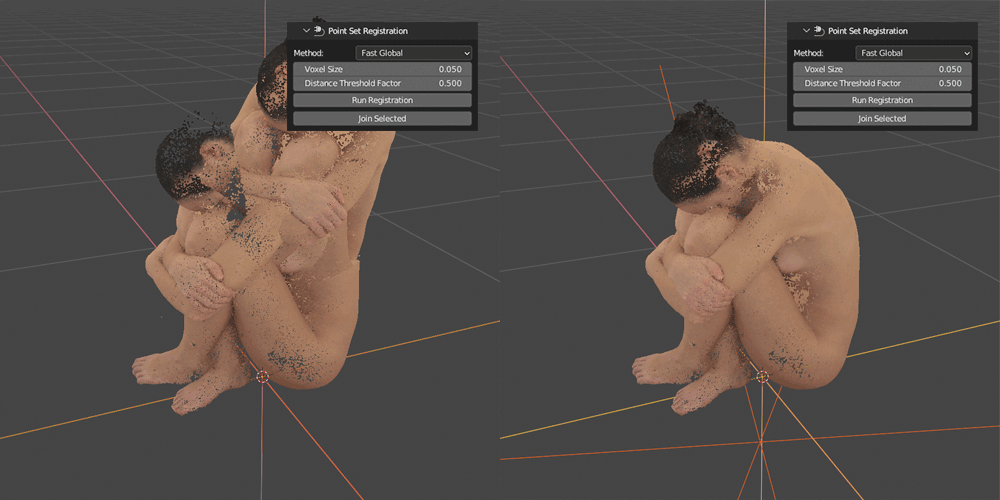
Align multiple PCV instances, selected are always aligned to active. There are several Method types to choose from. For details on each method see Open3D documentation. Generally Fast Global is good enough, if more precision is required, use Global with Local Refinement.
Surface Reconstruction ^^
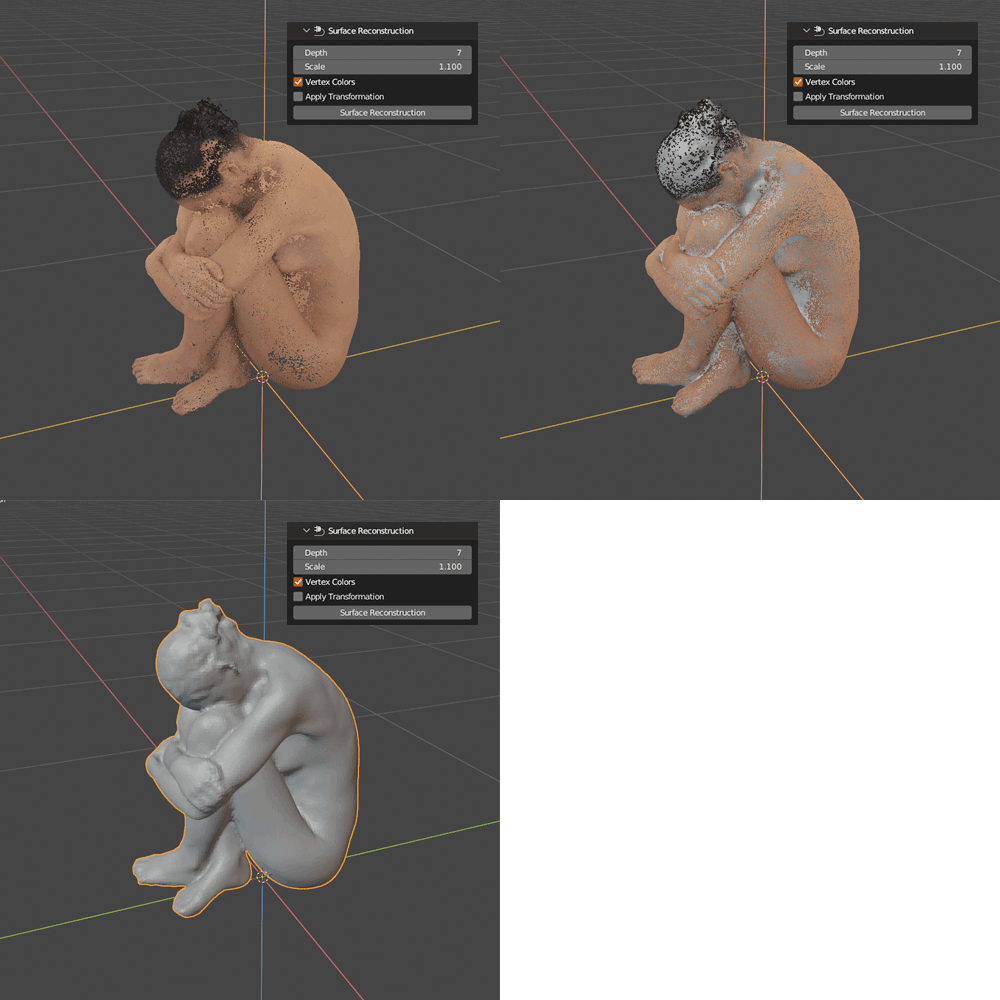
Reconstruct mesh surface. Depth controls mesh resolution. For correct results, points have to have normals.
Hidden Point Removal ^^
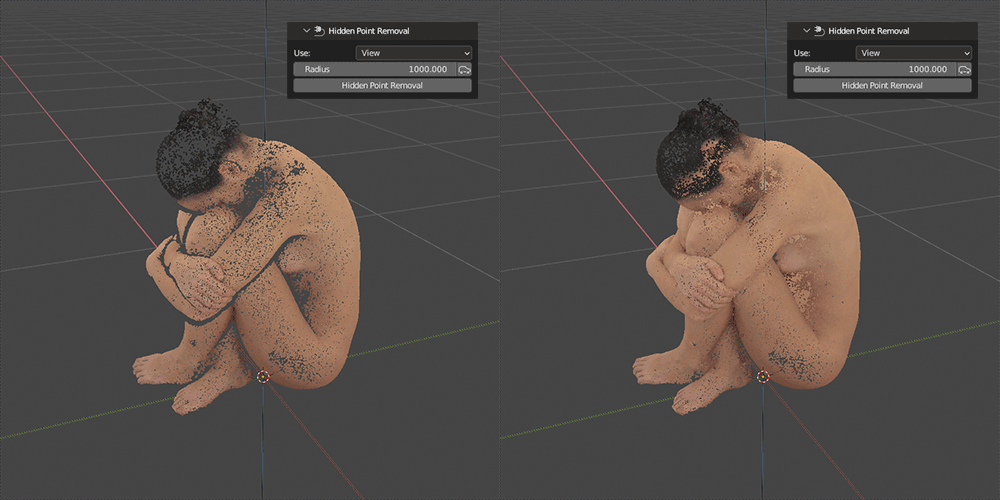
Estimates and removes hidden points (i.e. occluded by other points closer to view location). Can use current 3d viewport view or an object in scene.
Curvature ^^
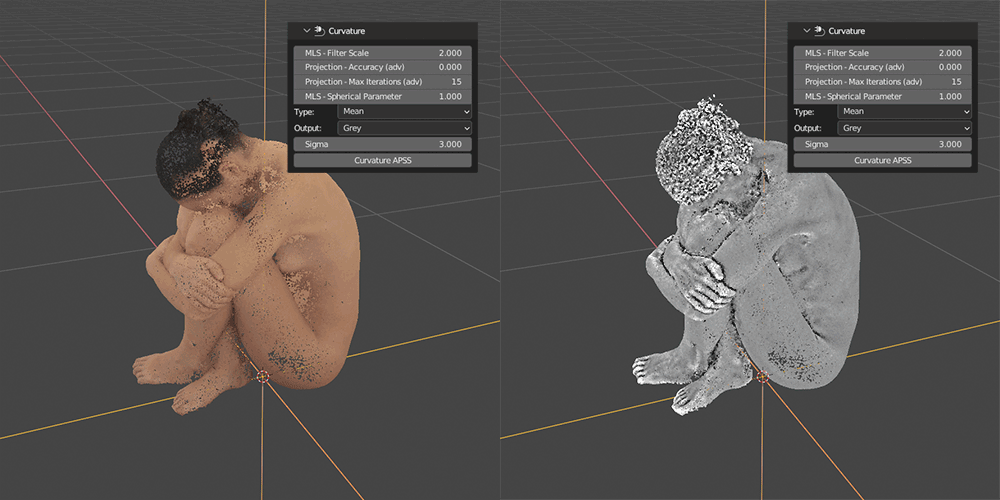
Compute curvature on points from underlying surface and output to colors or scalar.
Render ^^
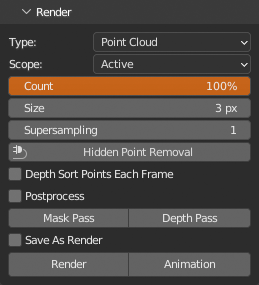
Render with OpenGL single or multiple PCV instances to image or sequence of images with transparent or 3d viewport background (as looks in Solid viewport shading). Points are always rendered with active shader used for drawing in viewport. Scalars, normals and bounding box is rendered if enabled and drawn in viewport. Clipping planes are used during rendering as well.
Other blender objects can be rendered together with points if Type is Viewport. They will look as in viewport.
Images are rendered in Properties > Output Properties > Format Resolution X,Y and % dimensions and saved as set in Properties > Output Properties > Output (image file formats only) at path at the same panel. If Save As Render is enabled, Properties > Output Properties > Output > Color Management is used. Rendered images are directly saved to output directory, they are not opened in image editor area as regular Blender renders.
For anti-aliased images, use Supersampling 2 or larger. At value 2 renders image at 200% size (3 at 300% etc.) and then downsamples to output resolution. This is limited by maximal gpu image (texture) resolution so be careful with value, use the smallest acceptable, usually at 2, amount of anti-aliasing is sufficient.
If you render points with alpha per point and Alpha shader, or if you use other Global Alpha then 1.0, for best result enable Depth Sort Points Each Frame for correct alpha blending. On the other hand, rendering will be slower because sorting is performed in python and not in gpu.
Hidden Point Removal runs Hidden Point Removal filter (requires Open3D to be installed) on points on each frame using render camera location
Postprocess applies postprocesing on renders as in viewport, but adjust setting first for rendering in Render panel. Because of different resolution, result may look different then in viewport.
Mask Pass and Depth Pass saves separate files with mask and depth buffer.
If you start Blender from command line you can observe animation rendering progress in terminal.
If you want to render points with Blender render engine (Cycles, Eevee or any other), points need to be converted to regular Blender object, see Convert section.
Convert ^^
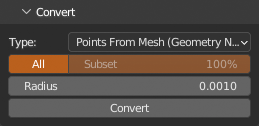
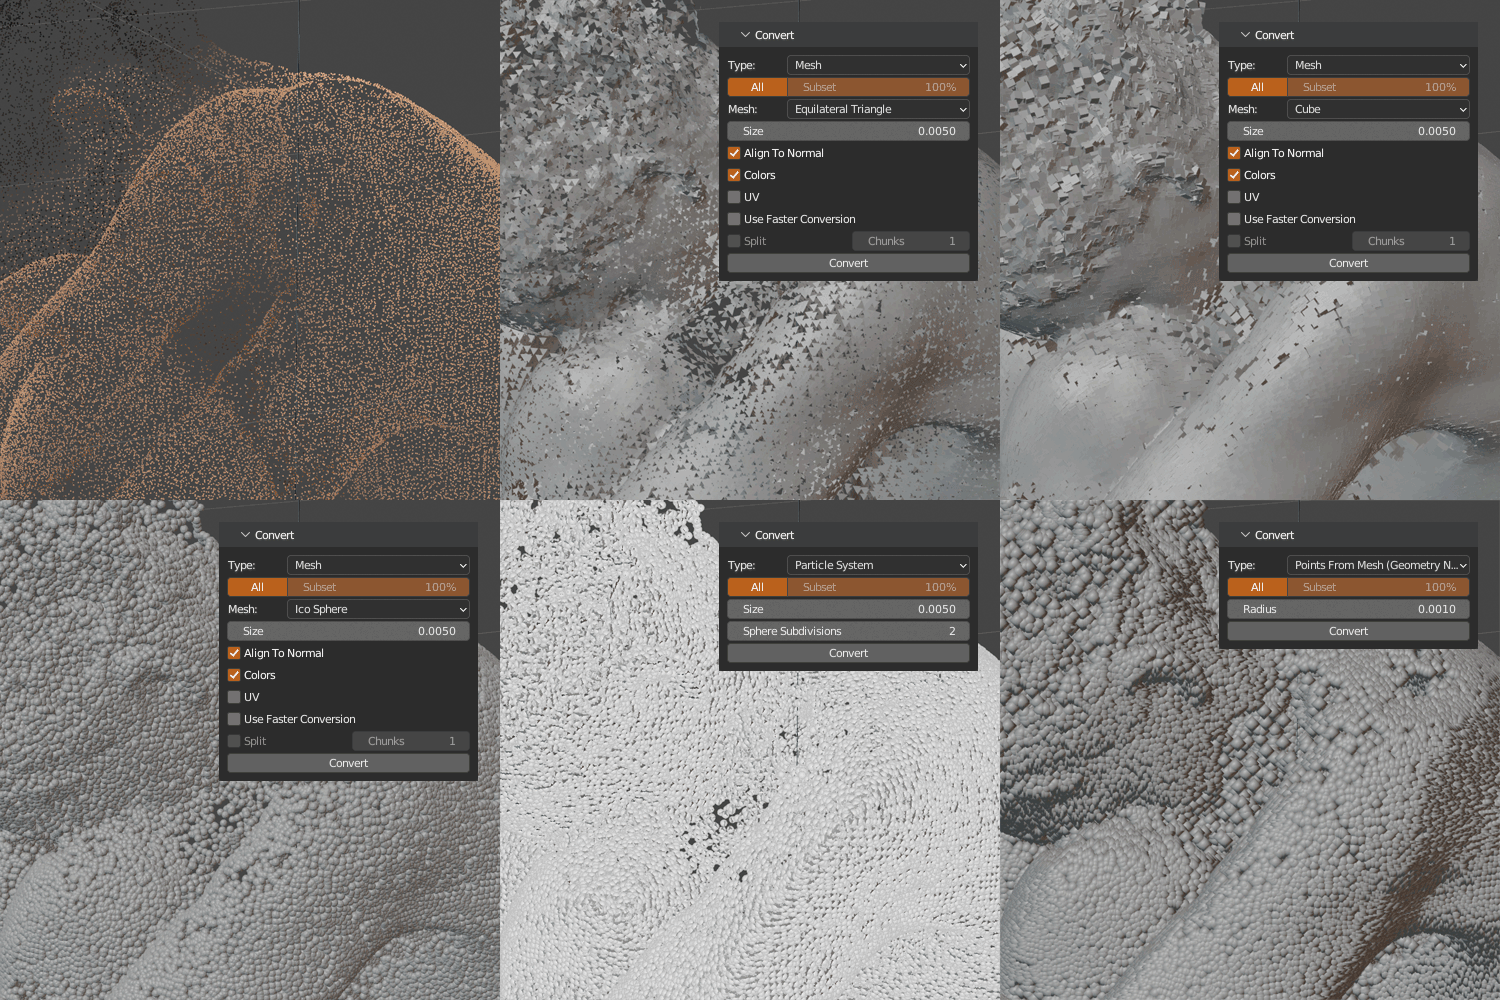
Convert points to native Blender data type. Converted points are then part of blend file and can be used like any other native Blender data. Colors (all types except plain vertices), normals and scalars (Geometry Nodes types) are always preserved.
Mesh ^^
Convert points to single mesh object where each point is replaced with mesh primitive. Material using original points colors is added.
Instancer ^^
Convert each point to triangle in mesh object and then instance sphere on all faces. Material using original points colors is added.
Particle-System ^^
Convert each point to triangle in mesh object and then add particle system emitting single particle from each face. Material using original points colors baked to texture is added.
Instanced Mesh (Geometry Nodes) ^^
Convert points to vertices with attributes, add geometry node system instancing mesh primitive on vertices, colored and rotated by attributes. Mesh primitive type can be changed by modifying node tree. Material using original points colors is added.
Points From Mesh (Geometry Nodes) ^^
Convert points to vertices with attributes, add geometry node system converting vertices to points, colored by attributes. Material using original points colors is added. Result will render only in Cycles as spheres (sphere radius can be set in nodes or on modifier).
Native Point Cloud Object ^^
Convert points to Blender native Pointcloud Object. Pointcloud Object is unfinished Blender feature, it is available only in Blender alpha builds.
Generate ^^
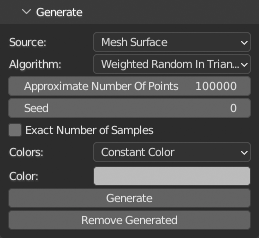
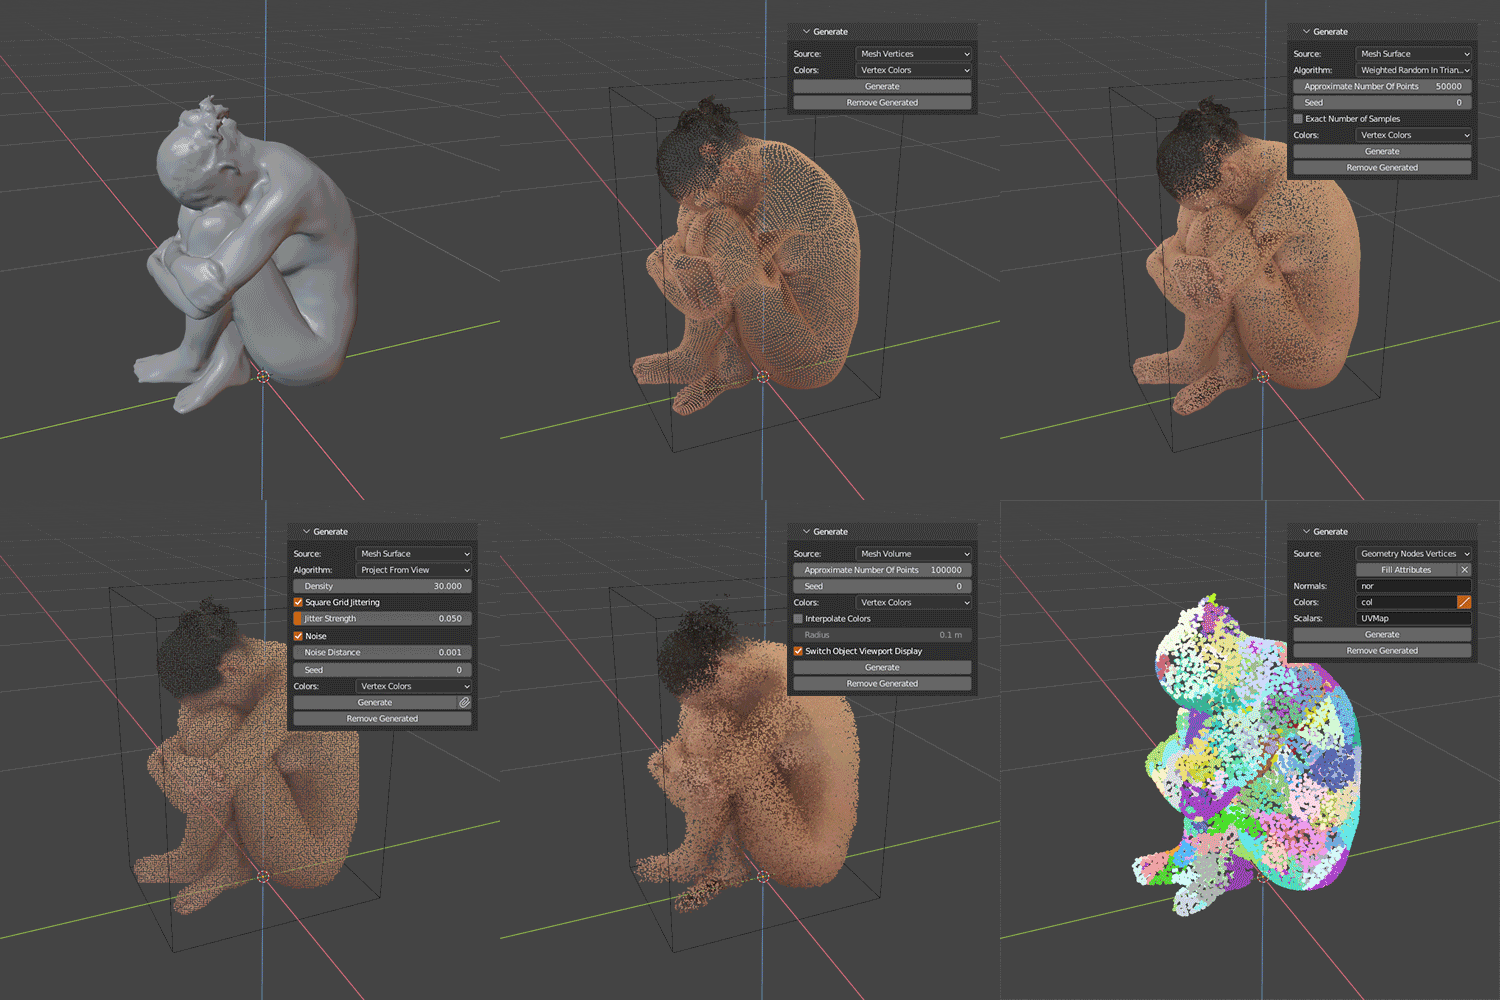
Generate points from meshes and other Blender data. Points can be colored by various methods, vertex colors, uv texture, vertex group or vertex attributes.
Mesh Vertices ^^
Direct mesh vertices to points.
Mesh Surface ^^
Generate points on mesh surface using one of algorithms:
- Weighted Random In Triangle: Average triangle areas to approximate number of random points in each to get even distribution of points. If some very small polygons are left without points, increase number of samples. Mesh is triangulated before processing, on non-planar polygons, points will not be exactly on original polygon surface.
- Poisson Disk Sampling: Warning: slow, very slow indeed.. Uses Weighted Random In Triangle algorithm to pre-generate samples with all its inconveniences.
- Project From View: Project square grid on mesh surface from view. Incremental mode is available, so consecutive runs append new points to existing. This can simulate real scanning process.
Mesh Volume ^^
Generate points in mesh volume. Mesh have to be non-manifold.
Particle System ^^
Particles from particle system to points
Native Point Cloud Object ^^
Points from Pointcloud Object (Pointcloud Object is unfinished Blender feature, it is available only in Blender alpha builds)
Geometry Nodes Vertices ^^
Points from vertices generated by Geometry Nodes. Normals, colors and scalars can be set from different attributes found on evaluated vertices.
Export ^^
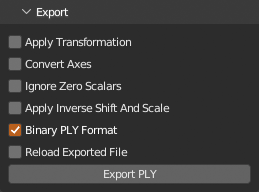
Export loaded points as PLY file. All point data (including all hidden points or scalar values) is saved.
Sequence ^^
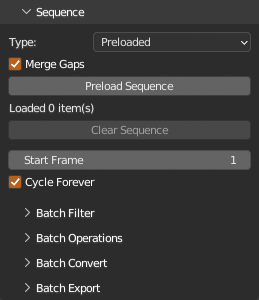
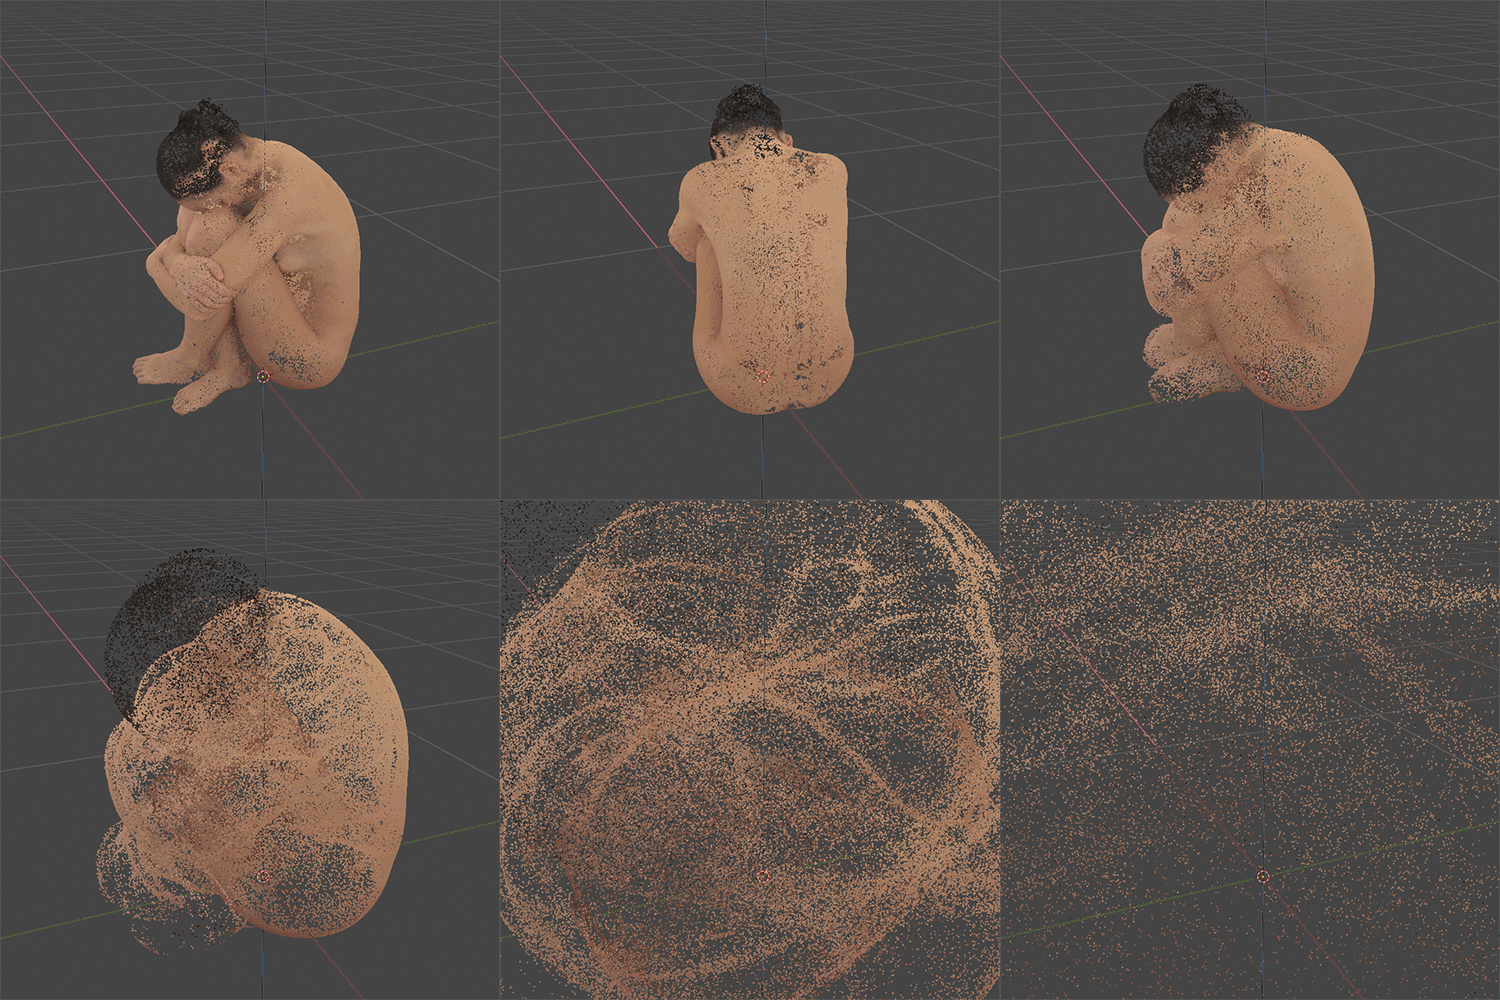
Display sequence of PLY files. Add PCV instance, load first file of sequence. Then use Sequence panel to load the rest of sequence. Points from files can be preloaded to memory for smooth playback, or loaded on fly. Preloaded sequence displays only current frame that need to fit in gpu memory, but the rest of loaded files is in system memory. If you run out of system memory it is better to use on the fly loading type.
Batch Filter ^^
Apply select filter on all loaded sequence frames. Settings for filter is taken from its panel in Filter section. Filter settings can also be animated.
If you start Blender from command line you can observe progress in terminal.
Batch Operations ^^
Place for other operations on sequences with character that does not fall under filter category.
Batch Join: Join points per frame from multiple sequences into single sequence, sequences will be joined over whole timeline, empty frames will be skipped. IfShuffle Joined Pointsis enabled, points will be shuffled per frame.
If you start Blender from command line you can observe progress in terminal.
Batch Convert ^^
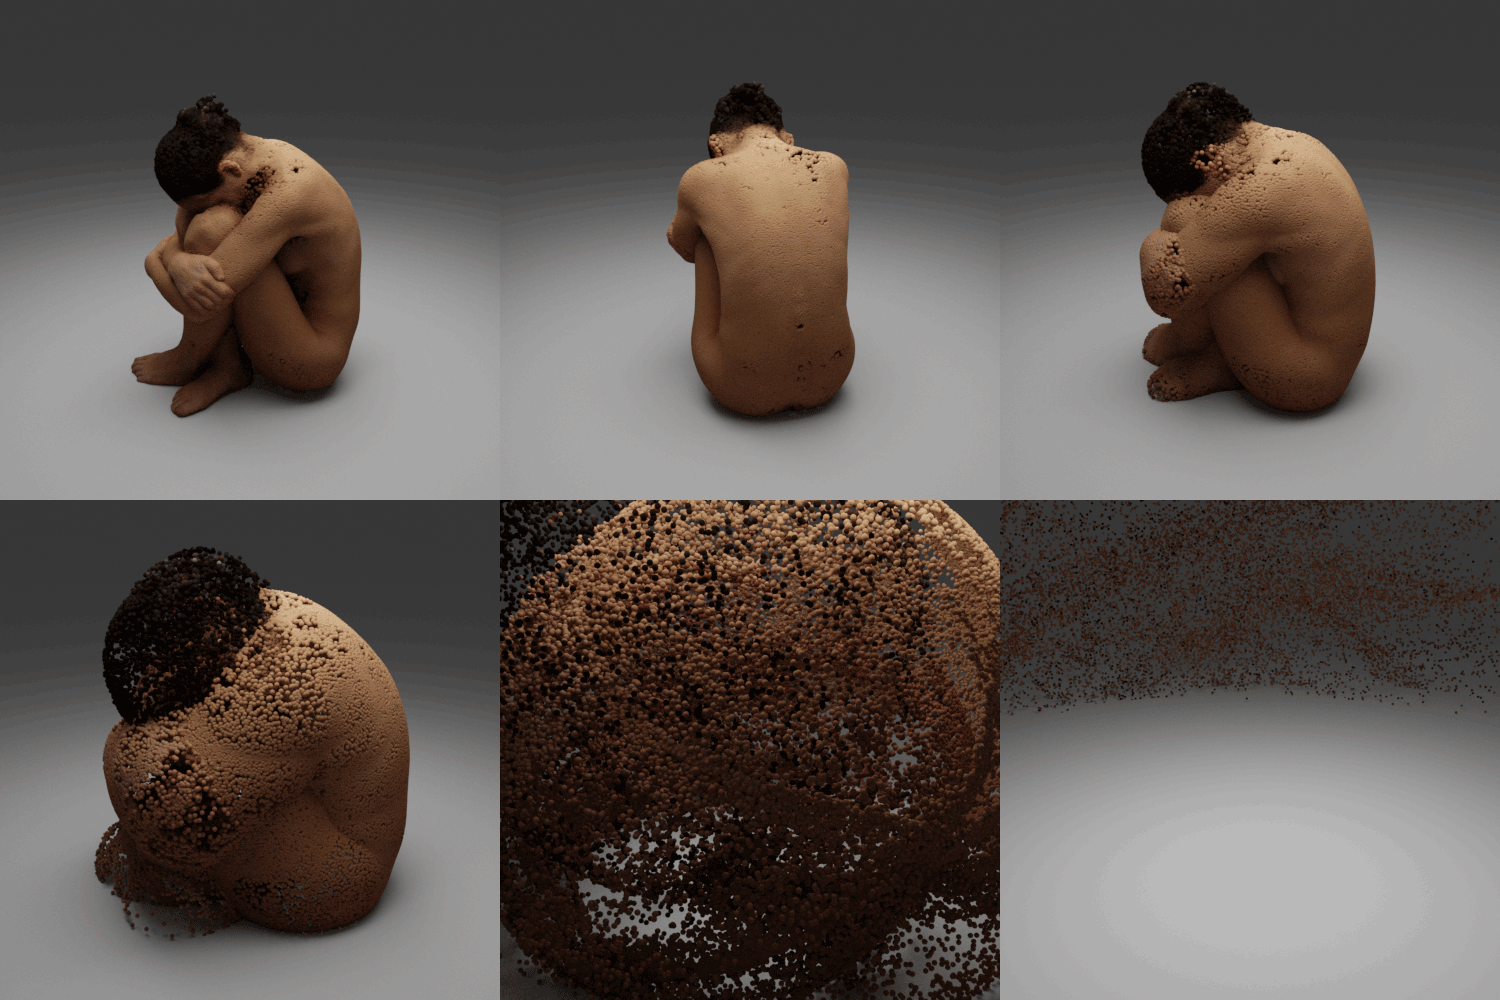
Convert each frame to Blender data type as set in Convert panel. Animation hiding/unhiding frame object is created automatically so playback is preserved.
If you start Blender from command line you can observe progress in terminal.
Batch Export ^^
Export each frame as PLY file using setting from Export panel.
If you start Blender from command line you can observe progress in terminal.
3D Viewport Panel ^^
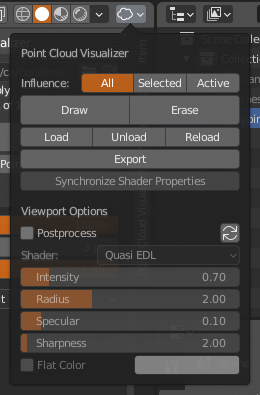
Panel is located in 3D viewport header in right corner as last item (unless other addon adds its menu there)
Batch Actions ^^
Here you can run actions on all PCV instances in scene that fall under Influence selection. Draw, Erase, Load, Unload, Reload, Export and Synchronize Shader Properties all PCV instances in scene at once.
Postprocess ^^
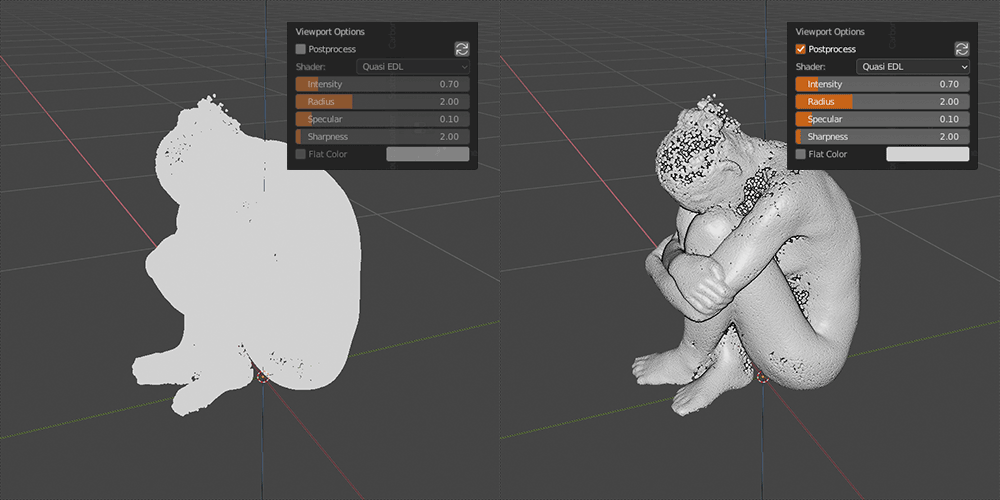
Viewport postprocessing. All draw calls from PCV goes to Offscreen first, then everything is drawn on top of viewport using selected shader. Because of that points will be always on top.
Currently there is only one shader option: Quasi EDL, something very similar to Eye-Dome-Lighting. Points are shaded in screen space by their depth. No normals are required. The best use for it is when your points have no other data than point locations.
Preferences ^^
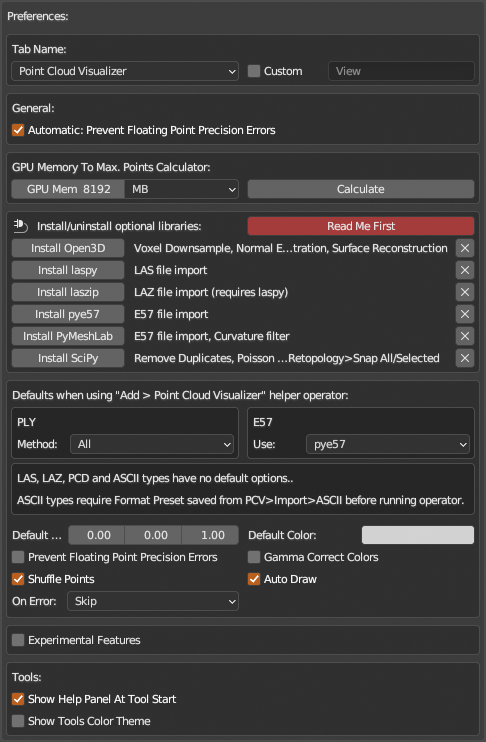
Tab Name ^^
Tab Name: if Point Cloud Visualizer is too long for your tabs, you can change to shorter PCVCustom Tab Name: if set to existing, PCV panel is moved there
General ^^
Automatic: Prevent Floating Point Precision Errors: Attempt to prevent floating point precision errors by scaling and moving points to fit <1.0e6 diagonal and <1.0e4 center coordinate. Original scale and location could be optionally restored when points are exported back to PLY. If this options is enabled, it this will be done automatically upon loading any file and notification will popup if that has been done.
Calculator ^^
Calculate theoretical maximum of displayable points for given gpu memory, floored to nearest tens of millions. Result is valid only when Default shader is used and nothing else displayed, i.e. location and color per point only.
Optional Libraries ^^
Install optional libraries by clicking Install NAME. Restart Blender after each installed library. To uninstall library, click its X button.
Defaults ^^
Default options for helper operator (add empty object to scene and load points from selected PLY) 3D Viewport > Add > Point Cloud Visualizer [Shift+A]
Tools ^^
Show Help Panel At Tool Start- Disable to hide help panel for each tool.Show Tools Color Theme- Edit color theme of Tools to fit your Blender theme.
⚠️ Experimental Features ^^

Feeling adventurous? Experimental section in Preferences lets you enable upcoming features. Detailed bug reports welcome!
Packer ^^
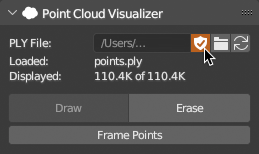
Store loaded points as hidden mesh datablock with attributes in blend file. Automatically restore and draw points from datablock at blend file load, save points to datablock on blend file save.
This operation is meant to be fully automatic (if Auto Pack and Auto Optimize options in preferences are enabled, they are by default) once loaded point data are marked for packing clicking Pack icon next to file path on main PCV panel (this will work for any file formats, even those loaded using Import panel).
If Packer is enabled, main operators (Draw, Erase, Reload etc.) will prioritize packed data (if available) over loading from ply file.
Operators
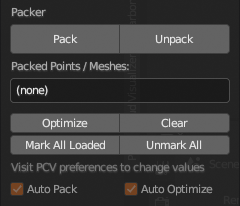
Packer adds utility operators to 3D Viewport Panel as well as list of packed datablocks in blend file.
Pack: manually run packing operatorUnpack: manually run unpacking operatorPacked Points / Meshes: list of datablocks in blend fileOptimize: manually remove all packed datablocks if container object has been deletedClear: manually remove all packed datablocks from blend fileMark All Loaded: mark all instances with loaded points for packingUnmark All: unmark all instances for not packing
Preferences
Auto Pack: pack all points that are loaded and/or displayed when blend file is being savedAuto Optimize: remove packed datablocks on blend file save if container object is not found in scene
Viewer ^^
Load and display very large datasets that does not fit into gpu memmory. Octree, Level of Detail, Camera Frustum, Threading, PLY, LAS/LAZ and E57, all of it is there..
- Viewer is indirectly connected with 3d viewport where it has been started, if you change viewport to some other editor type, viewer will stop, if you maximalize viewport area, it will stop, if you open non-popup file select dialog, it will stop. If by any way original viewport is not found, Viewer will stop and reset (this behavior might change in future for some cases, if viewport connection is resumed in some given timeout). Other 3d viewports then initial will draw points, but they will not react on camera view changes (may be changed in future, but because of performance it is now omitted and most likely it will stay like that).
- Loading, octree preprocessing, sorting octree nodes according to camera view and their distance from camera, all of it runs in separate threads, so it does not block Blender, however processing data for gpu just before drawing cannot be done in background (Blender will crash instantly) so Blender will freeze a bit if a lot of octree nodes have to be updated at once (this might improve in future by processing it in smaller batches, but will not be eliminated).
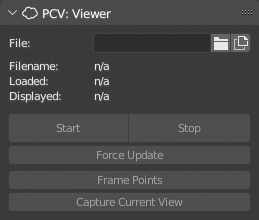
- choose file to load. PLY, LAS/LAZ or E57 (LAS/LAZ and E57 requires optional libraries to be installed,
laspy,laszipandpye57) StartandStopViewerCapture Current Viewwill send currently displayed points to main PCV and will stop Viewer
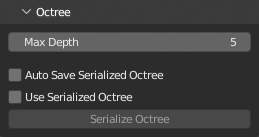
Max Depth: Maximum octree depth, lower values does not work well with larger datasets, higher values are slower to compute
Already processed octree can be saved to disk to speed up processing next time file is being loaded. It will save compressed JSON file next to original file, with -pcv_octree.json.gz suffix. This can be automated so it is always saved with Auto Save Serialized Octree option and with Use Serialized Octree enabled, serialized data will be preffered when file is loaded. However, file contents cannot be changed, otherwise saved octree will be invalid. Also, although compressed, serialized octree files are not small.
To significantly speed up json operations, install orjson library, it is installed as other libraries from PyPI with PCV Preferences > Experimental Features > Install Optional Libraries button. This step is optional, if library is not found, python builtin json module will be used.
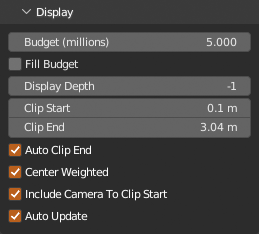
Budget (millions): Maximum number of points displayed at once (value * 10 ** 6)Fill Budget: Fill display budget from higher subdivisions if there is space left according to current viewDisplay Depth: Limit maximum displayed depth, at -1 value Max Depth is usedClip Start: Highest octree depth at this distance or less will display, outside of Clip Start and Clip End range only lowest depth is displayedClip End: Lowest octree depth at this distance or more will display, outside of Clip Start and Clip End range only lowest depth is displayedAuto Clip End: Adjust Clip End distance to loaded points bounding box diagonal * 3Center Weighted: Prefer octree nodes closer to viewport camera origin and center axis when budget is being filledInclude Camera To Clip Start: Display also highest depth nodes in range between camera location and clip start distanceAuto Update: If enabled, Viewer update is run on any Display property change, if disabled, changes will apply on viewport view update (e.g. viewport camera is moved) or by Force Update operator button on main panel

Size and Alpha of displayed points, Default Shader basic stuff
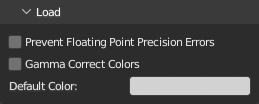
Prevent Floating Point Precision Errors: same as in PCV, if serialized octree is used, this have to be set the same as at time octree is serializedDefault ColorandGamma Correct Colors, basic loading stuff

Batch Files To Octrees: operator to preprocess multiple files in single directory to serialized octrees, this is blocking operator, to watch progress, start Blender from command line
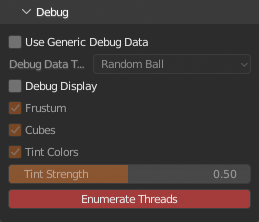
Debug Display: draw debug extras in viewport, viewport camera frustum and depth segments, octree cubes and tint point colors by their depth in octree
Add Menu ^^
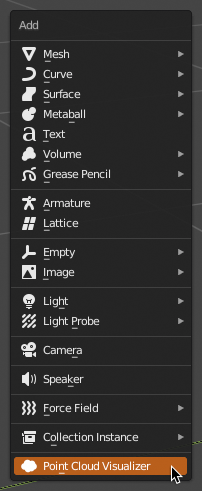
Helper operator to add an empty object with PCV instance and points from selected file can be run from 3D Viewport > Add > Point Cloud Visualizer [Shift+A]. If multiple files are selected, they will be added as separated PCV instances. Any file format that is readable by PCV can be loaded this way, only ASCII file types need to use preset that has been made and saved in advance.
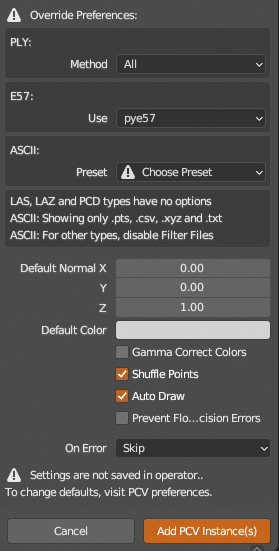
Default options can be set in PCV > Preferences, options can be also overriden while operator is running in file browser sidebar.
API & Debug Mode ^^
API
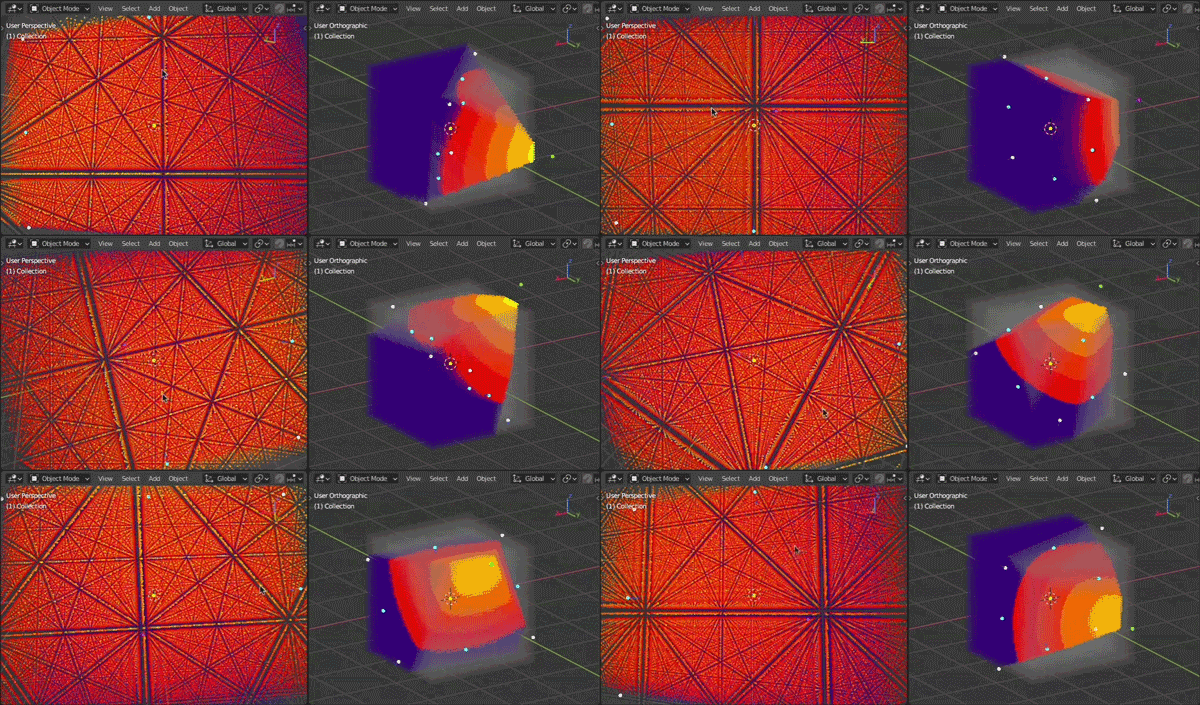
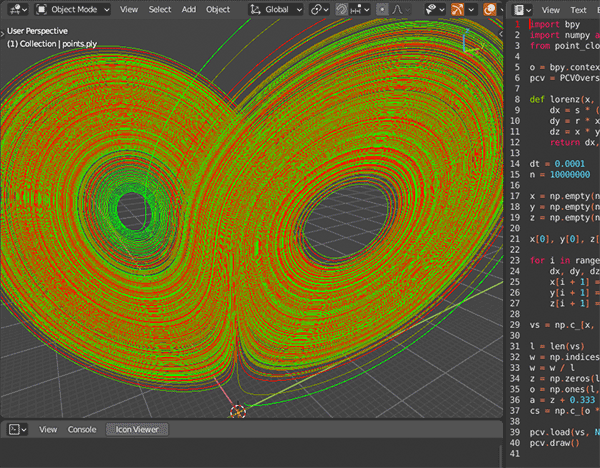
To display some basic point data
import bpy
import numpy as np
import point_cloud_visualizer as pcv

# get container reference
o = bpy.context.active_object
# "register" object
pcvo = pcv.mechanist.PCVOverseer(o)

# generate some data to display
n = 1000
vs = np.random.normal(0, 2, (n, 3))
ns = np.full((n, 3), (0.0, 0.0, 1.0))
cs = np.random.random((n, 3))

# access properties and change default values to something more suitable
pcvo.props().display.vertex_normals = True
pcvo.props().display.vertex_normals_size = 1.0
pcvo.props().display.vertex_normals_alpha = 1.0
pcvo.props().display.point_size = 6
pcvo.props().display.draw_in_front = True

# load and draw data on screen
pcvo.load(vs, ns, cs, draw=True)

# stop drawing
# pcvo.erase()

# stop drawing and remove from memory
# pcvo.free()
To display some more advanced point data
import bpy
import numpy as np
import point_cloud_visualizer as pcv

o = bpy.context.active_object
pcvo = pcv.mechanist.PCVOverseer(o)

# generate some data including scalars
n = 1000
vs = np.random.normal(0, 2, (n, 3))
ns = np.full((n, 3), (0.0, 0.0, 1.0))
cs = np.random.random((n, 3))
dt = [('v0', int), ('v1', float)]
scalars = np.empty(n, dtype=dt)
scalars['v0'] = np.arange(n, dtype=int, )
scalars['v1'] = np.linspace(1.0, 0.0, num=n, dtype=float, )

# create internal data object
pd = pcv.data.PCVPointData.from_arrays('_.ply', {'vs': vs, 'ns': ns, 'cs': cs, 'scalars': scalars, })

pcvo.props().display.use_scalar = True
pcvo.props().display.point_size = 6
pcvo.props().display.draw_in_front = True

# load data and draw data object
pcvo.data(pd, draw=True)
Debug Mode
If Blender is started from command line with --debug-value 1 (basically any non zero value, this can be also set at runtime by searching for Debug Menu and setting value in menu) PCV will log more info to a console. In some cases even operation progress.
Troubleshooting ^^
Points looks weird in viewport, they flicker or look “stratified”
- points overall dimensions or locations are too big to fit into 32bit float values required for display
- enable
Prevent Floating Point Precision Errorsin PCV > Load panel before loading file (or enable and click reload button) - points will be scaled and moved to fit in precision range during loading
- this transformation can be unapplied on file export back to original dimensions and locations
I got Missing vertex normals and Missing vertex colors warning messages under Shader drop down menu
- loaded data does not have normals or colors so currently selected shader cannot work properly, missing values are substituted by default normal or colors (exact values are in PCV > Load panel)
Points are not drawn in viewport on macOS in Blender 3.5
- PCV is not yet Metal ready, switch
GPU BackendinBlender Preferences > SystemtoOpenGL, Save Preferences and restart Blender. Metal support will be added as soon as possible.
Bugs? Suggestions? ^^
- Blender Market (Ask a Question button)
- blenderartists.org
© 2023 Jakub Uhlik
